

Creating an Account
The Facebook Business Manager is an efficient tool for organizing and managing your business activities.
Before you start:
- You must have a personal Facebook profile, which is required to verify your identity.
- To create a Business Manager account, you will log in using your Facebook username and password. This method is more secure than just using an email and password.
- Note that you can create a maximum of two Business Manager accounts. If you need more, coordinate with another member of your organization to create additional accounts.
Steps to set up your Business Manager account:
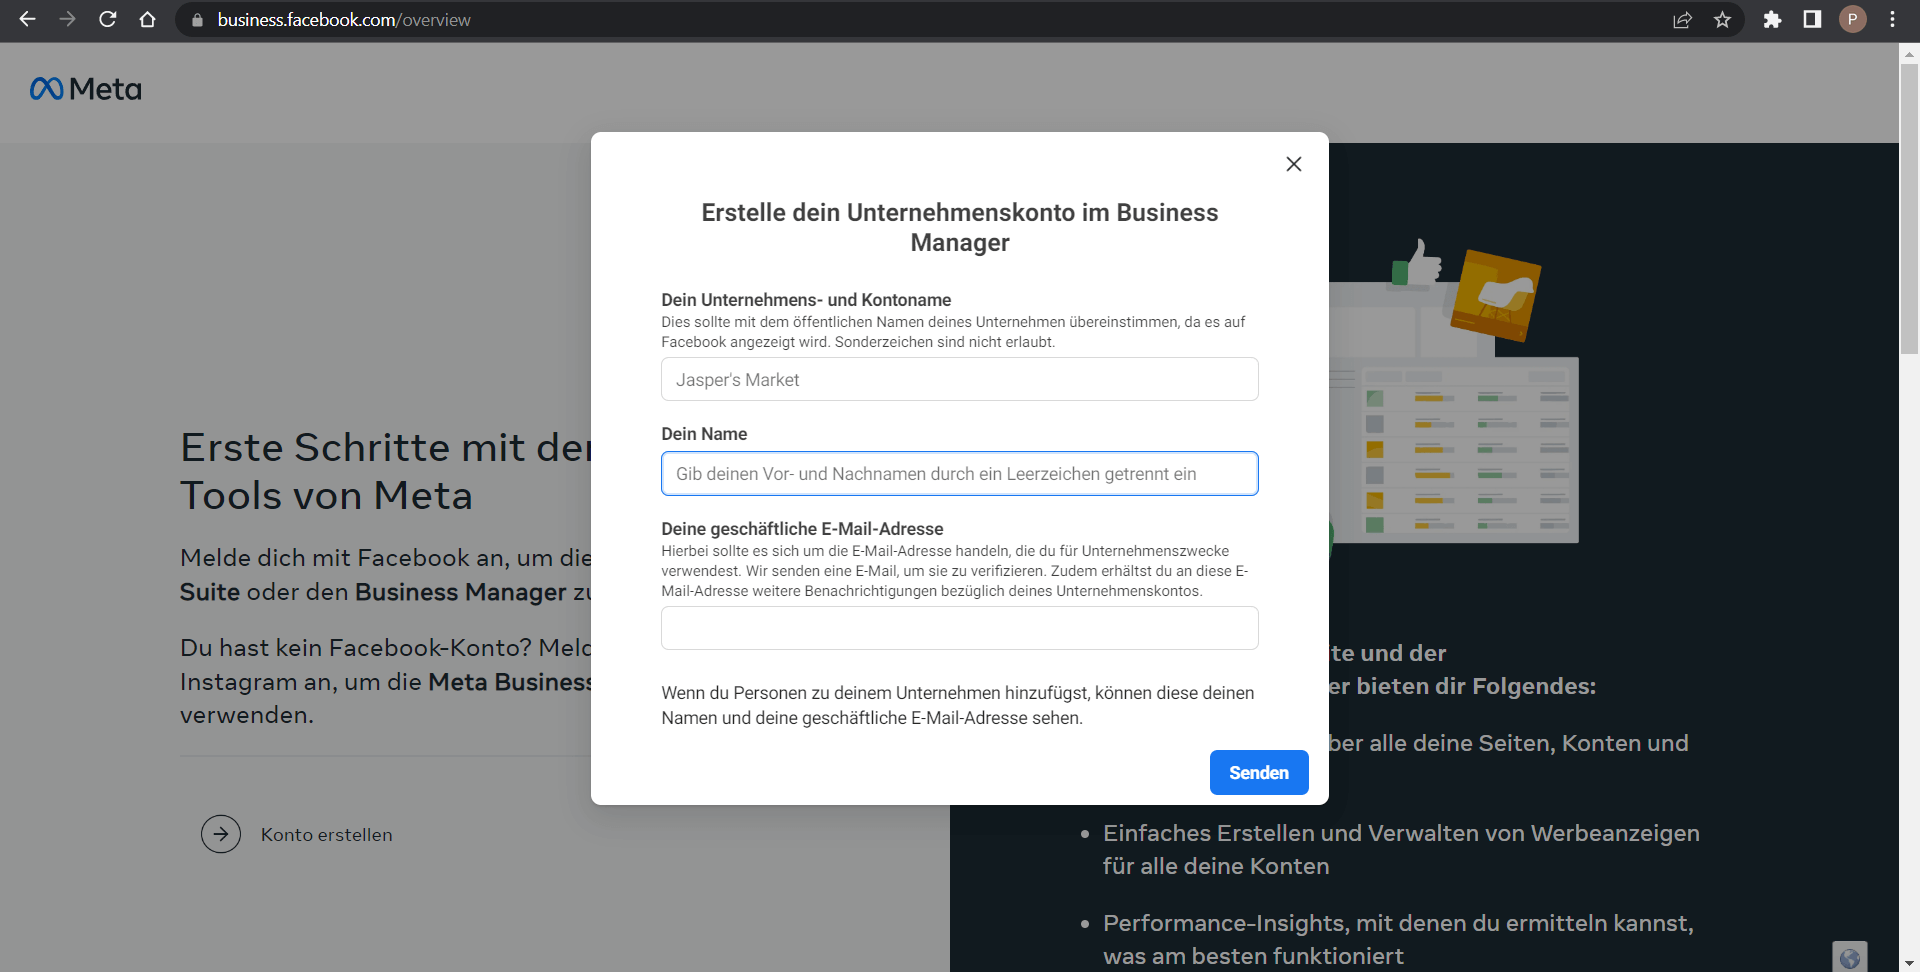
- Visit business.facebook.com/overview.
- Click Create Account.
- Enter your business name, your name, and your business email, then click Next.
- Provide additional details about your business and click Submit.
Adding People
Once your Business Manager account is created, you may want to add colleagues or other stakeholders who need access to your business assets.
How to add people and assign access:
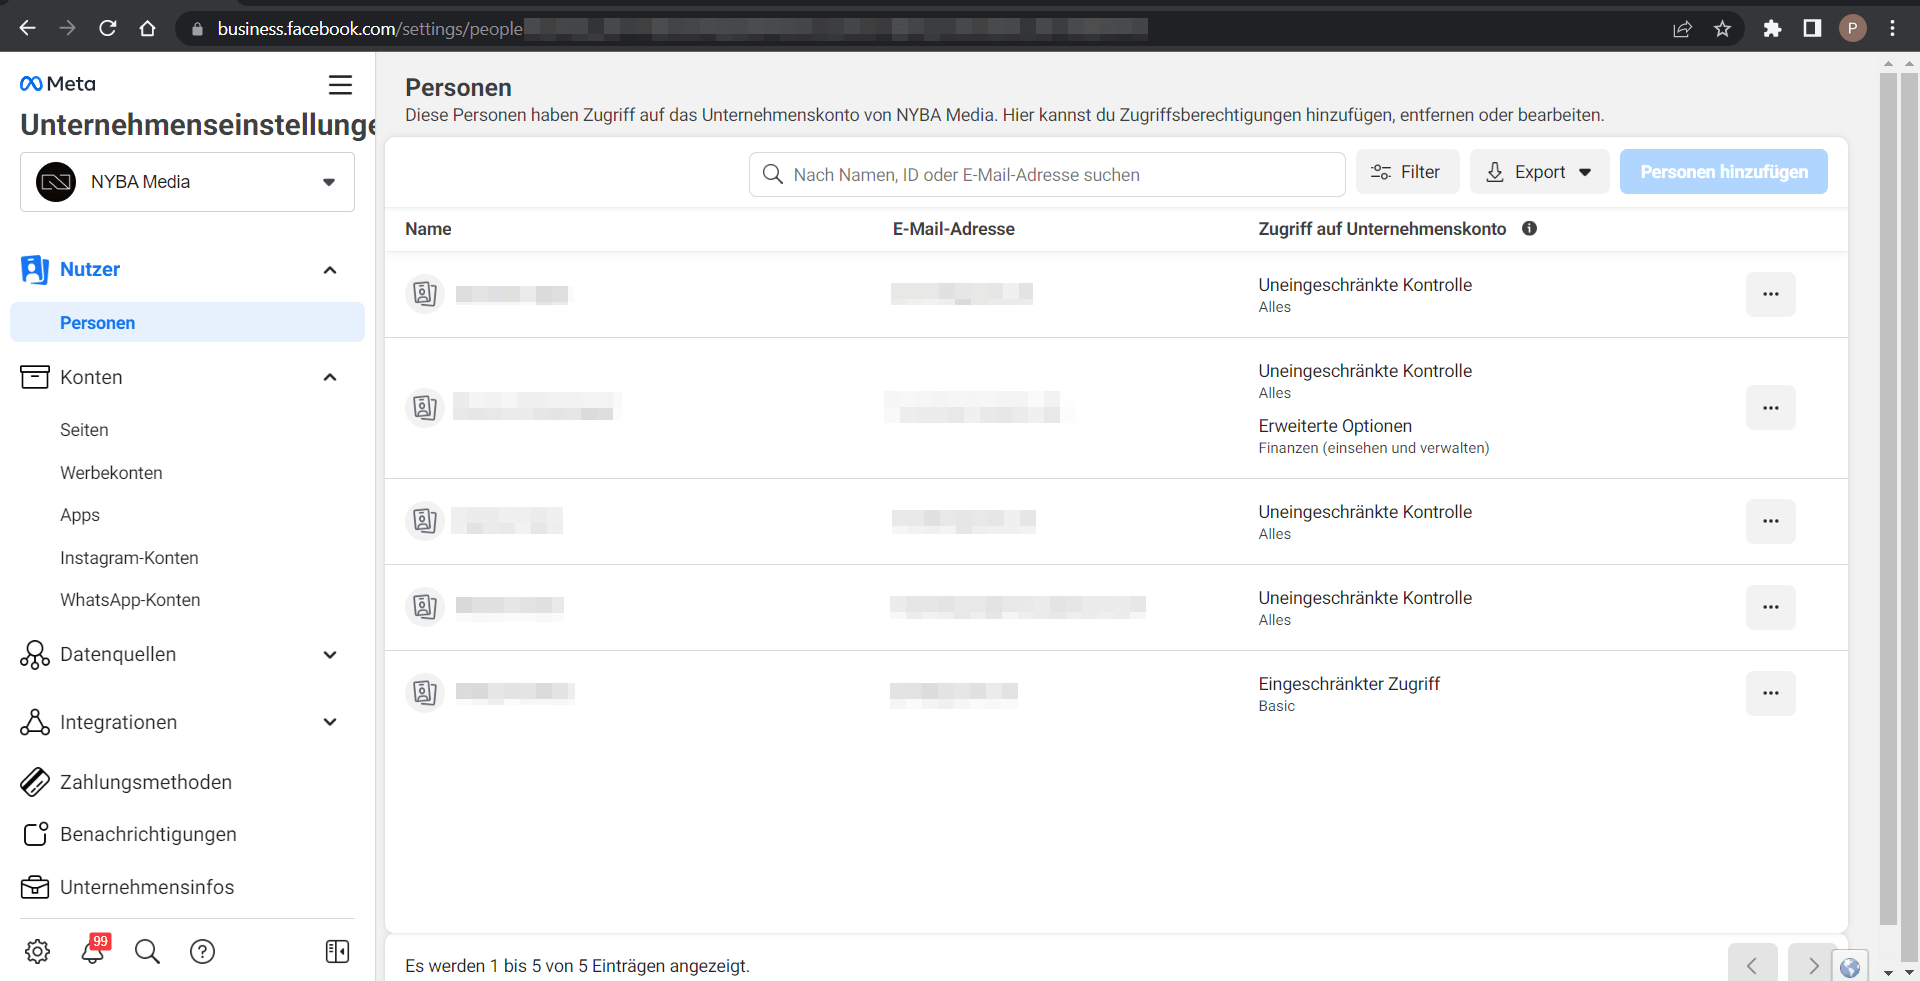
- Open Business Settings.
- Under Users, select People.
- Click Add.
- Enter the person’s email and click Next.
- Select the access level and click Next.
- Assign the relevant assets and permissions. For limited access, specify the tasks the person can perform. Click Invite.
- Review the invitation and click Send Request. The invited person will receive an email invitation to join the Business Manager.
Roles in Business Manager
Different roles define the permissions users have:
- Owner: Full access to all aspects of the Business Manager, including assigning roles.
- Admin: Can create new assets (ad accounts, pages) and assign roles.
- Editor: Can make changes to assets but cannot create new ones or assign roles.
- Employee: Limited access to perform specific actions.
- Finance Analyst: Can view financial details and activity.
- Finance Editor: Can edit payment settings and financial details.
Note: Roles can also have more granular permissions on specific assets, such as page-level roles (Admin, Editor, Moderator, Advertiser, Analyst).
Adding Ad Accounts
You can manage all marketing activities in one place by adding ad accounts:
- Add an Ad Account: Permanently moves an ad account to your Business Manager. You must be the owner of the ad account and an admin in Business Manager.
- Request Access: Request access to another company’s ad account. The admin can grant editing permissions.
- Create a New Ad Account: Permanently belongs to your Business Manager. Cannot be transferred to others without a Business Manager.
Steps:
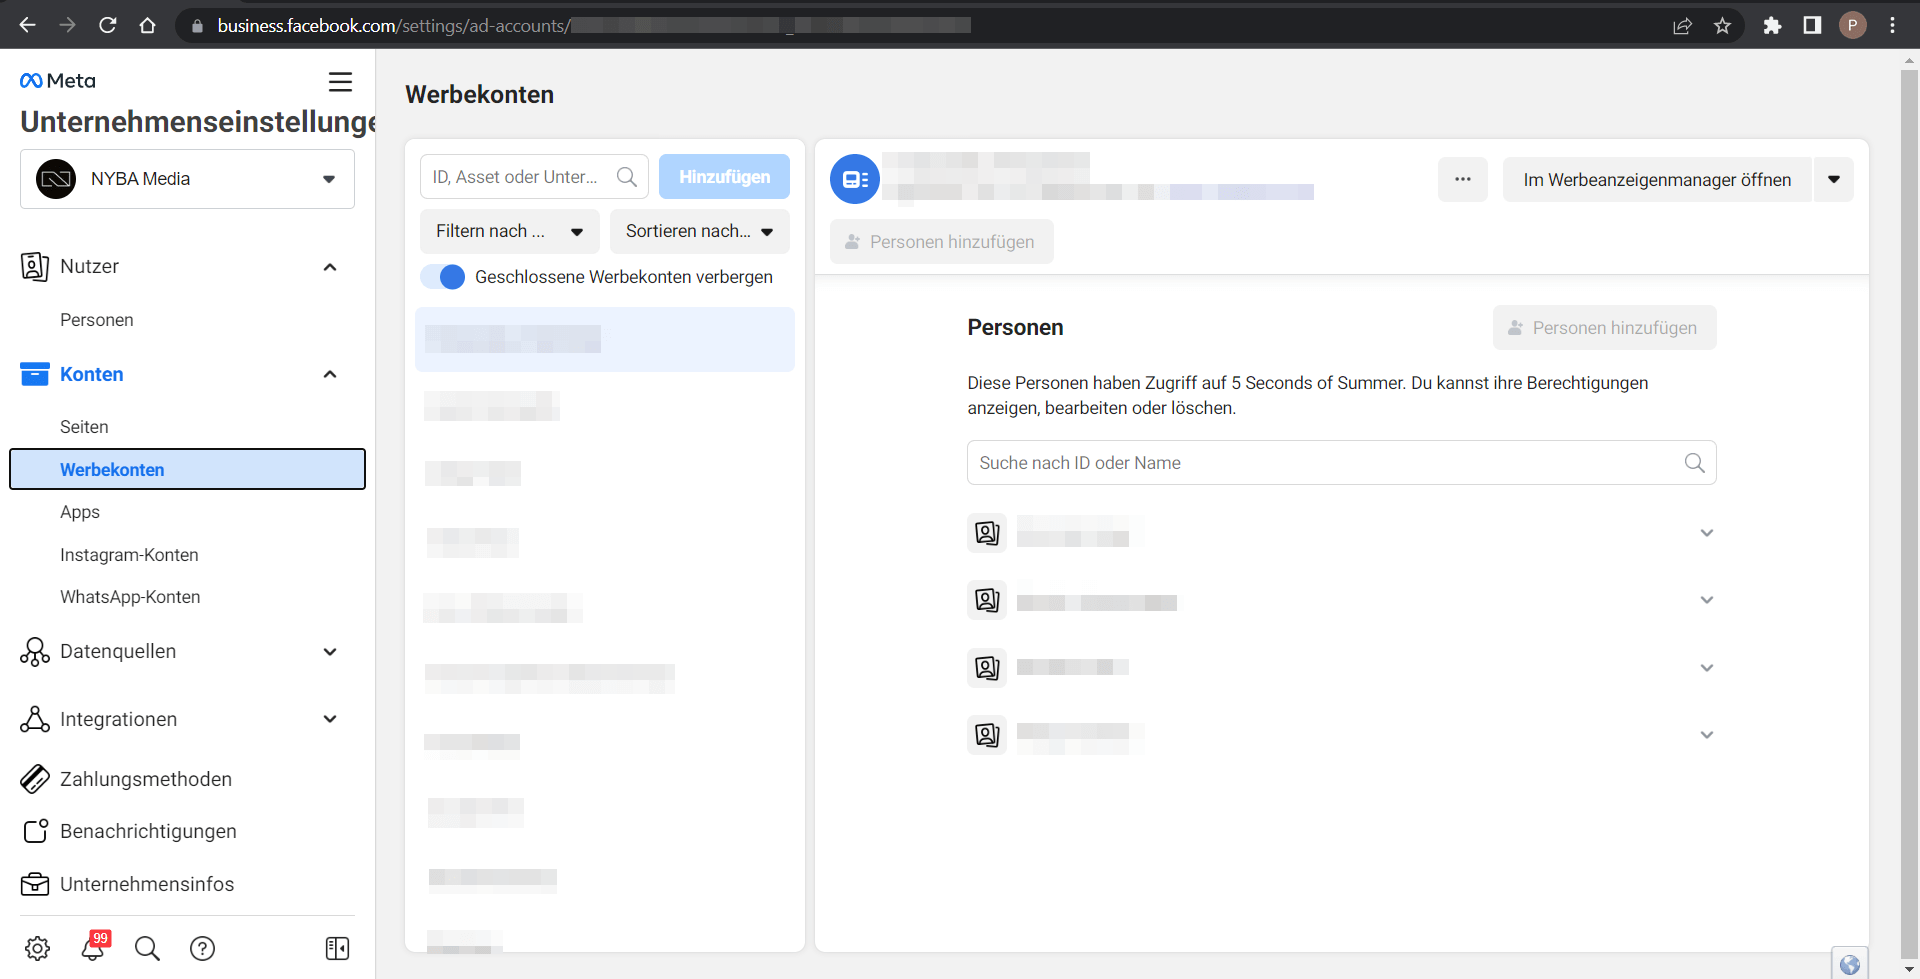
- Go to Business Settings.
- Click Accounts > Ad Accounts.
- Click Add and choose an option: Add, Request Access, or Create New.
- Enter the ad account ID if needed.
- Follow instructions to assign people and access levels.
Note: Disabled ad accounts cannot be removed and count toward your total.
Adding an Instagram Account
Integrate Instagram for centralized management:
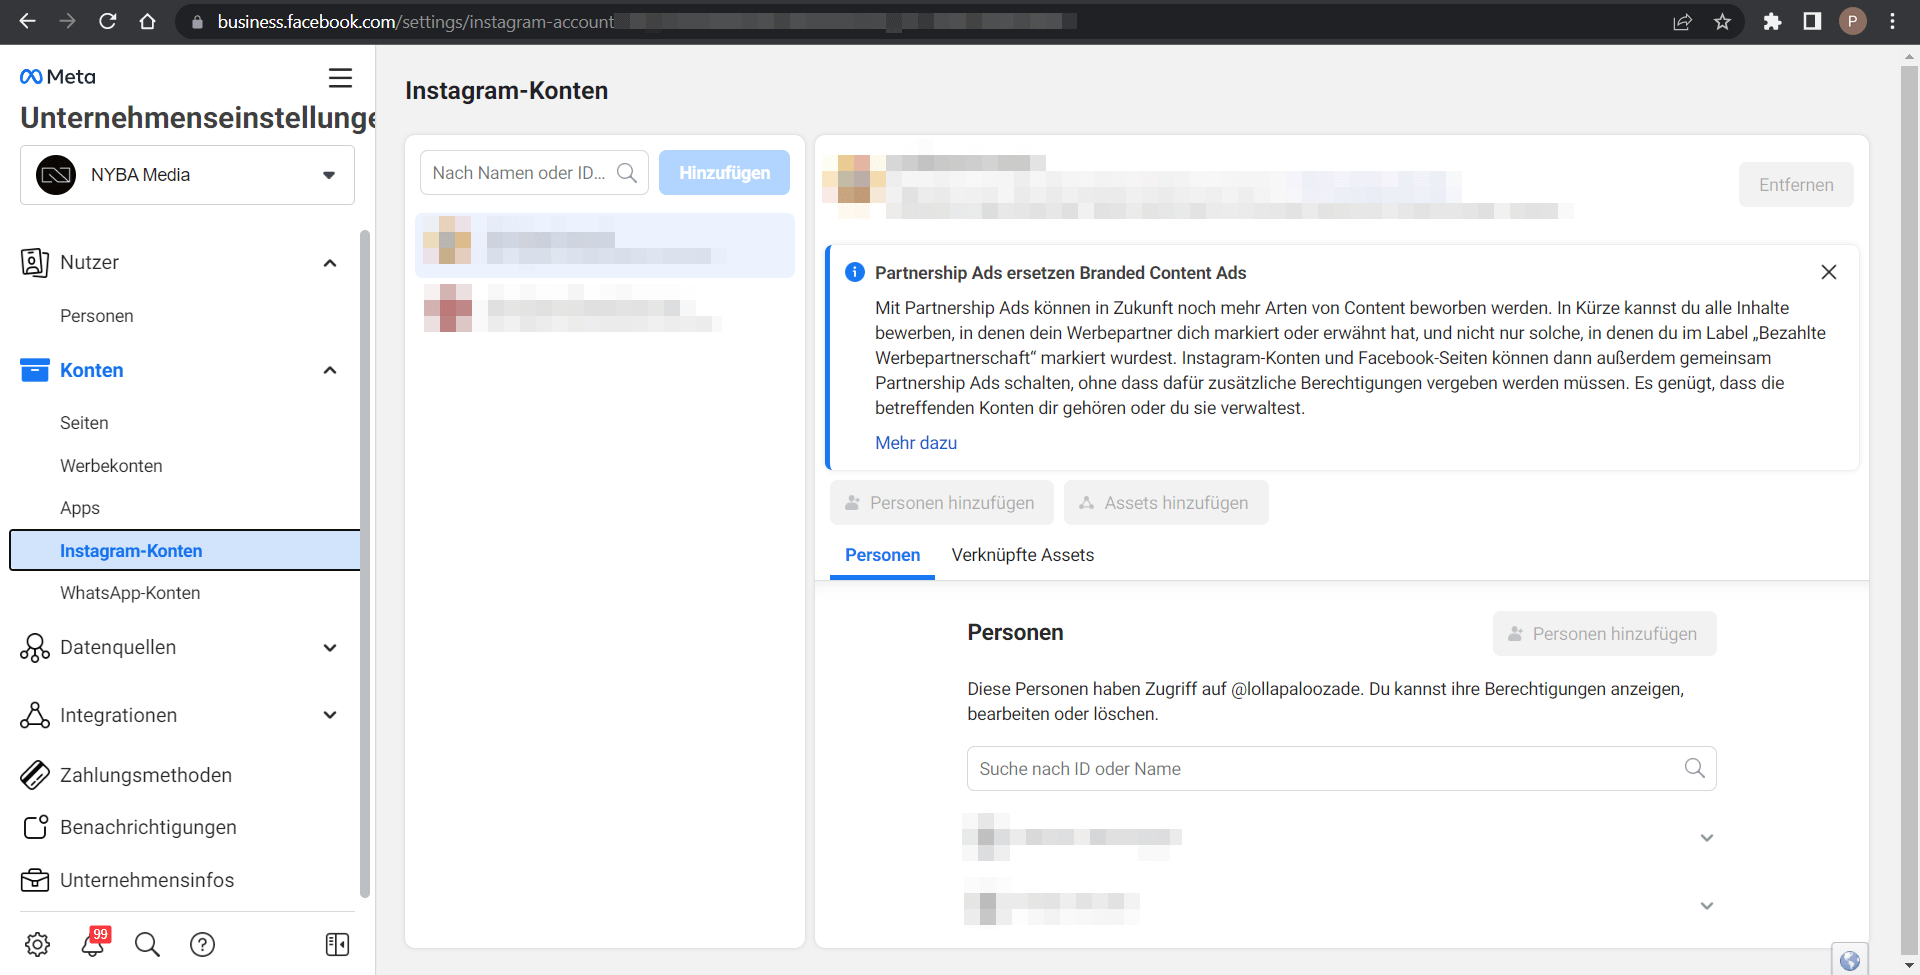
- Go to Business Settings > Accounts > Instagram Accounts.
- Click Add > Connect Your Instagram Account.
- Enter your Instagram username and password. Confirm via security code if required.
- Assign ad accounts and pages to your Business Manager or skip this step.
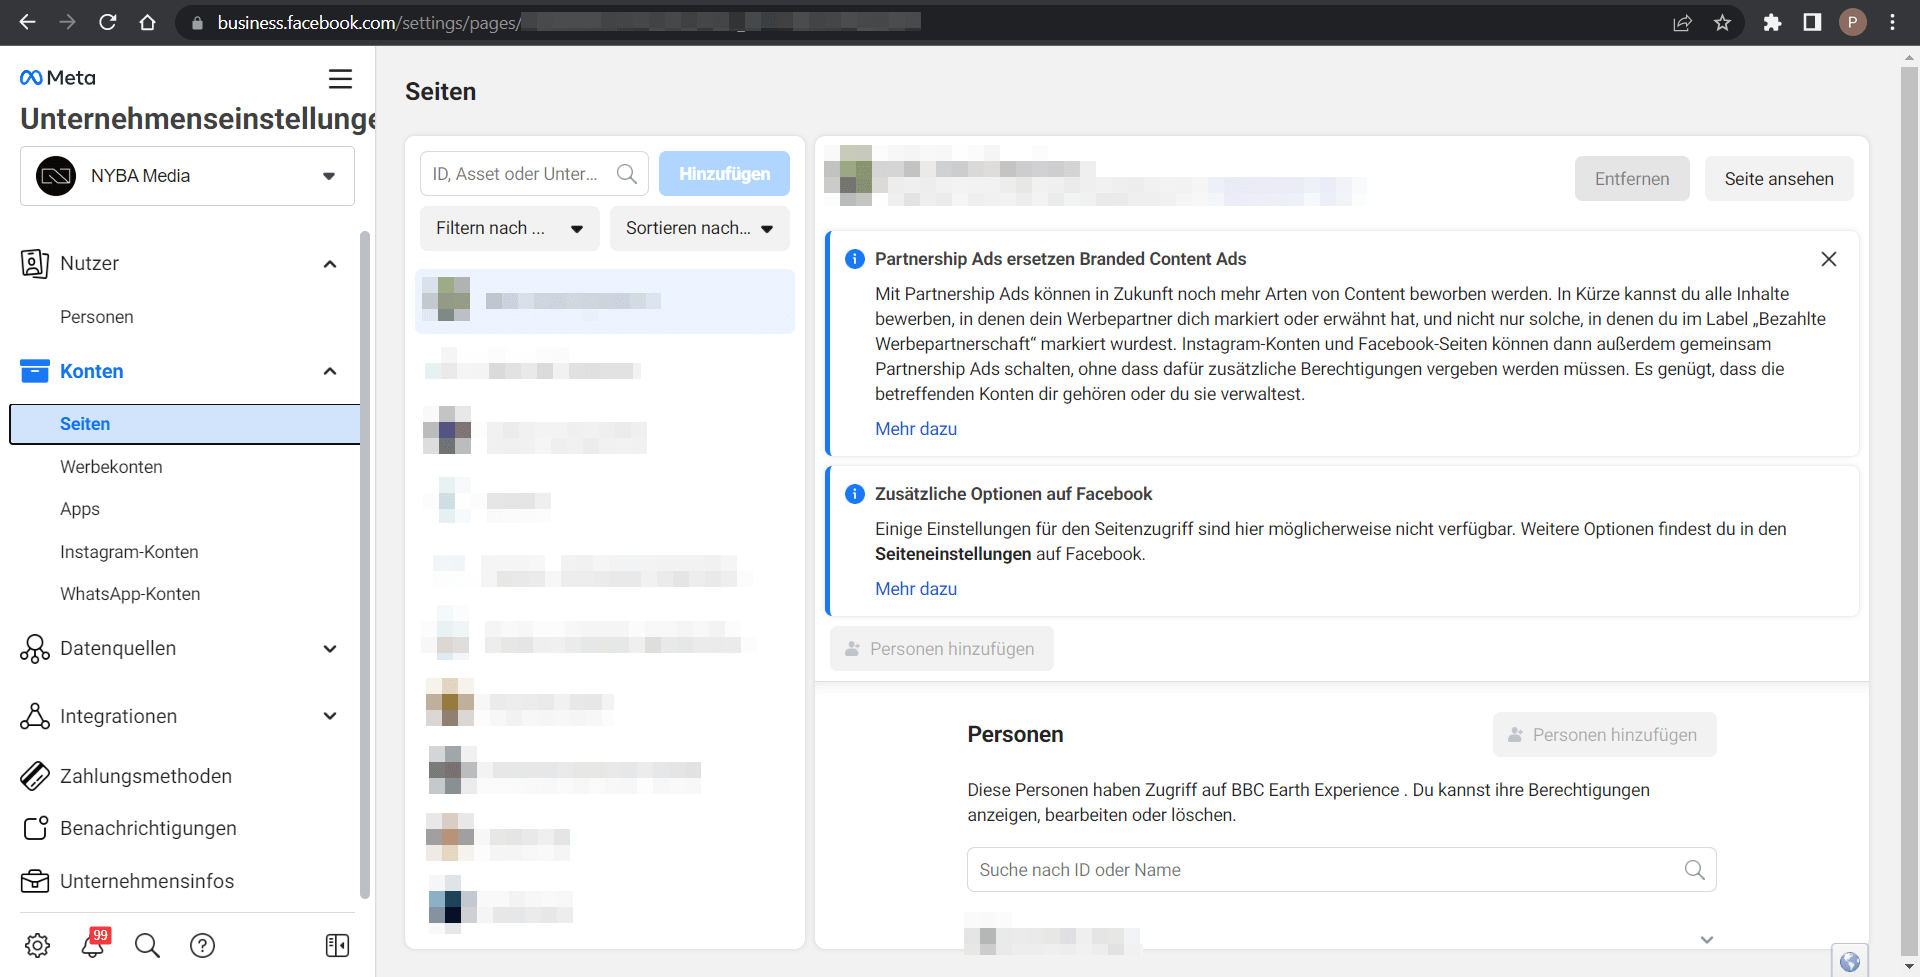
Adding a Facebook Page
Integrating your Facebook page centralizes management and confirms ownership:
- Open Business Settings > Accounts > Pages.
- Click Add > Add Page.
- Enter the page name or URL and click Add Page.
- Assign people to manage the page.
Note: Users with prior access retain their permissions.
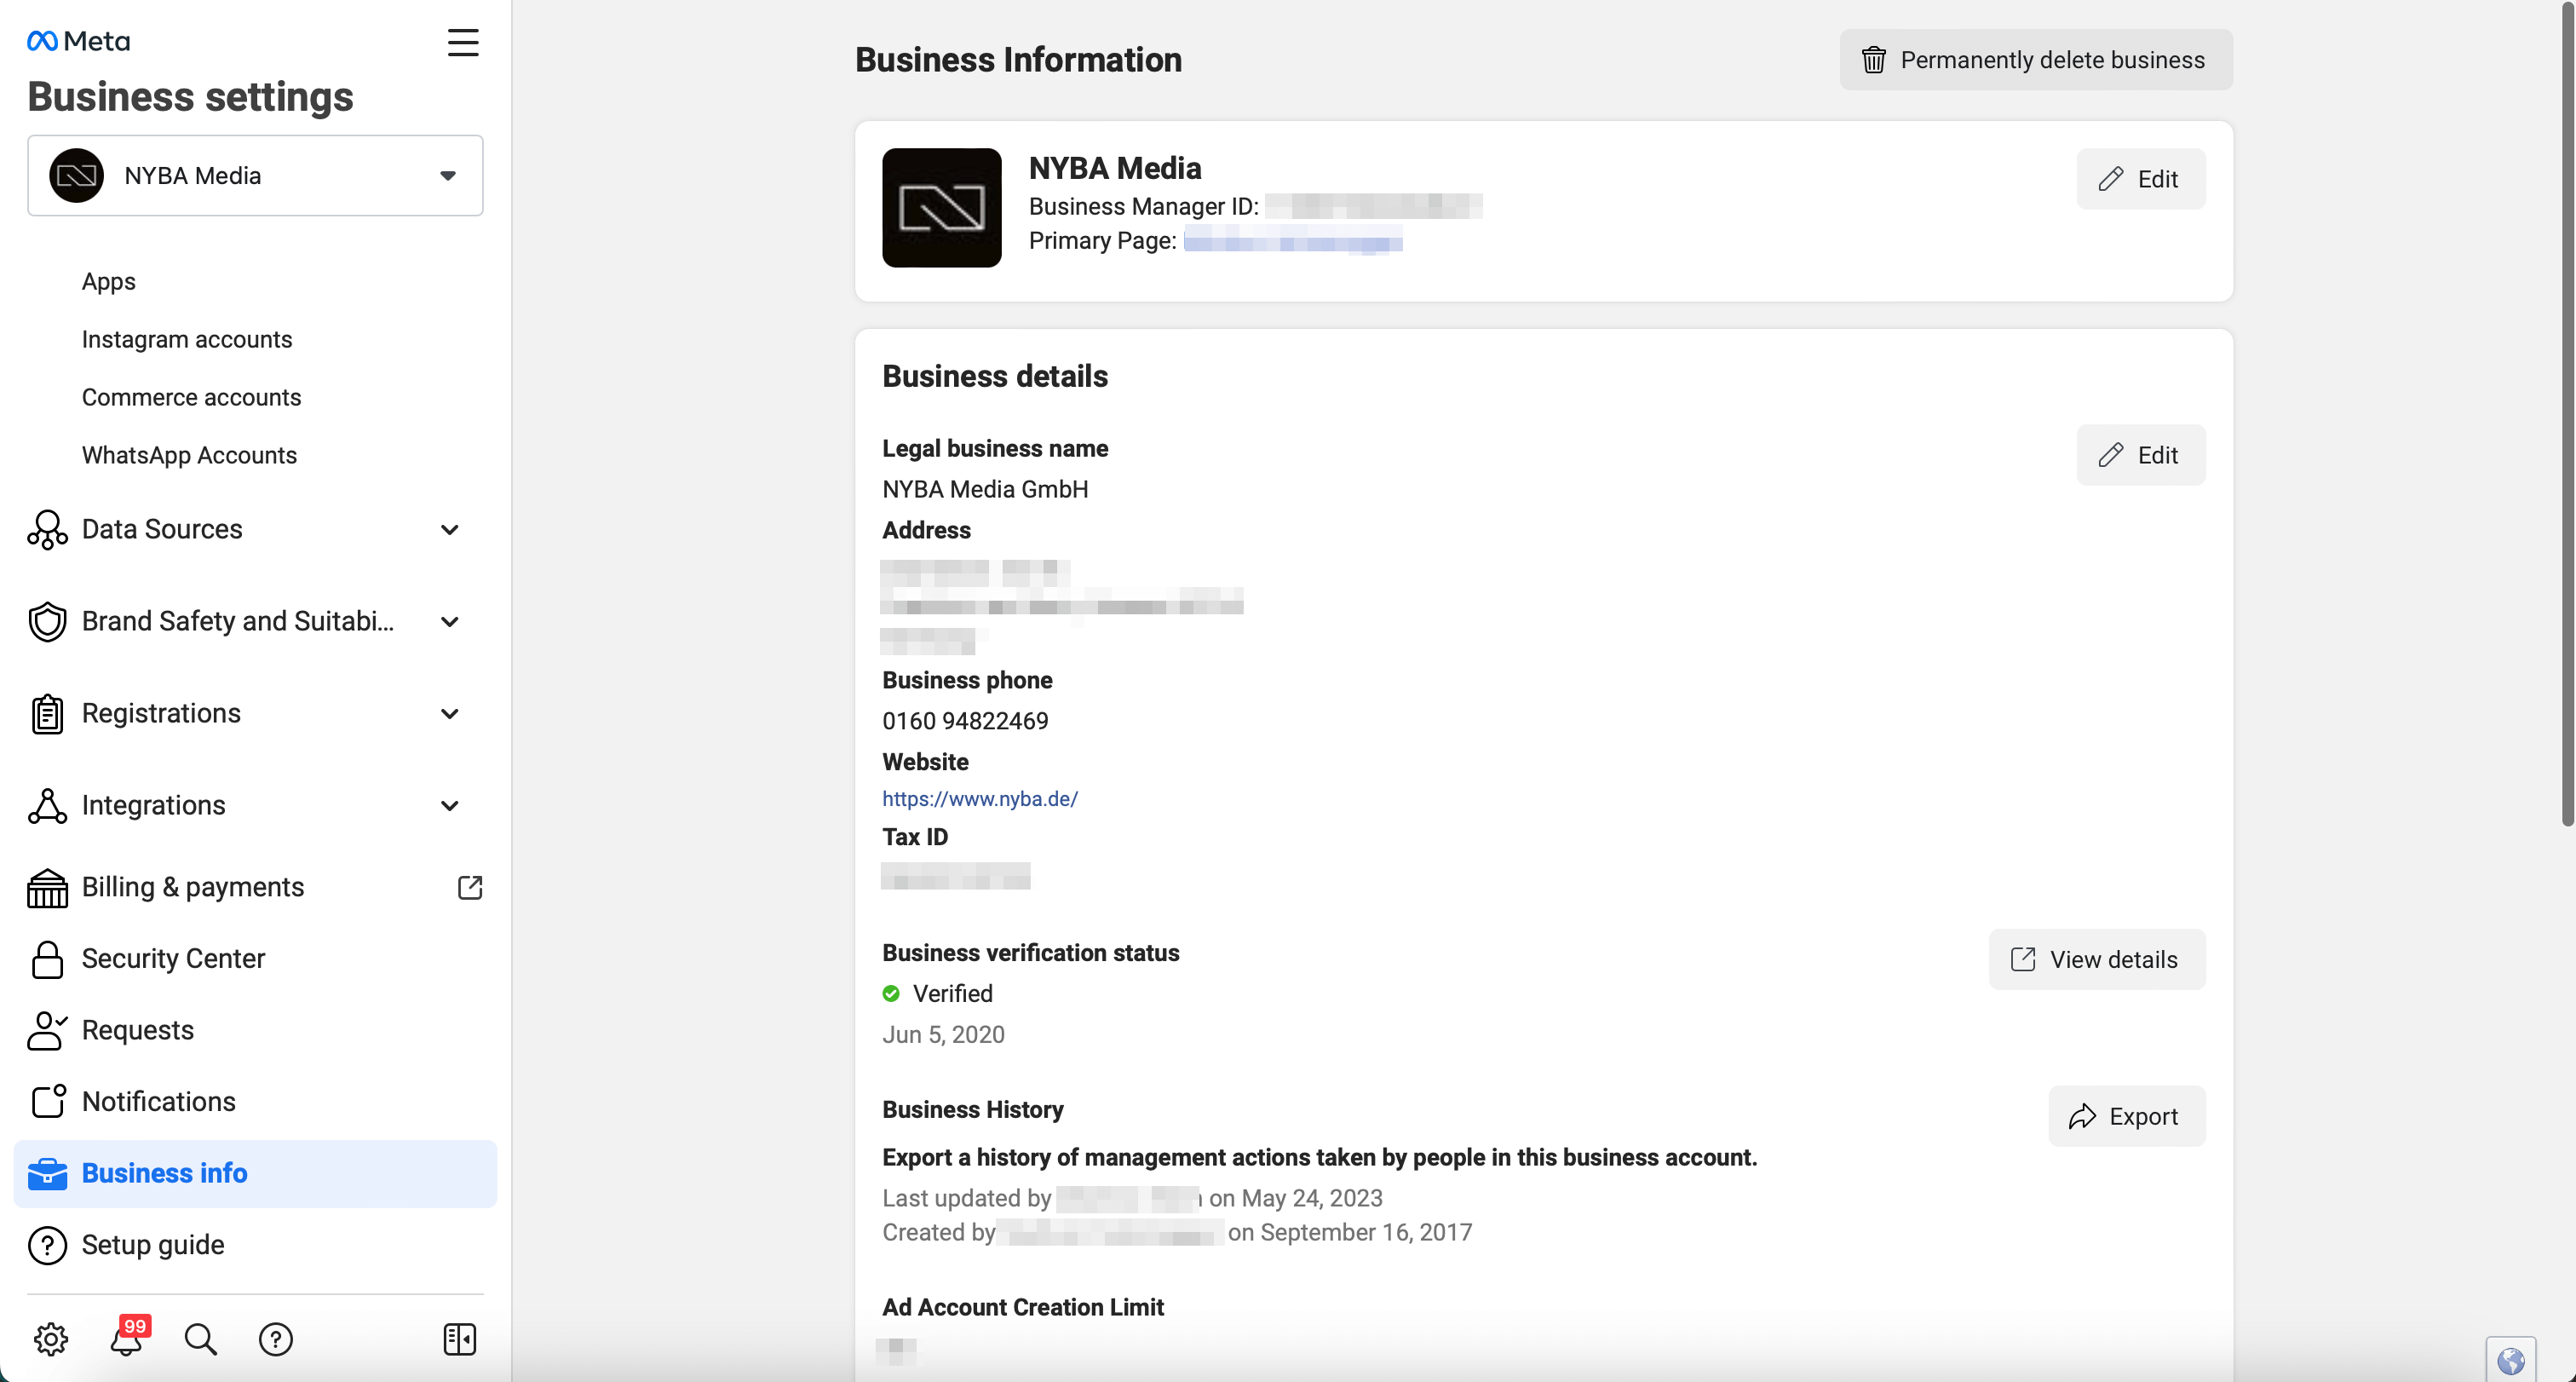
Business Information
The business information, also known as “Business Info”, in Meta Business Manager provides a central location to manage and update your company’s essential details. Here, you can find key information that is crucial for identifying your business on Meta platforms like Facebook and Instagram.
To access the Business Info section:
- Log in to your Meta Business Manager account.
- Click Business Settings in the left sidebar.
- Select Business Info from the dropdown menu.
It is important to regularly review and update your business information to ensure it is accurate and up to date. Correct business information helps build customer trust and strengthens your presence on Meta platforms.
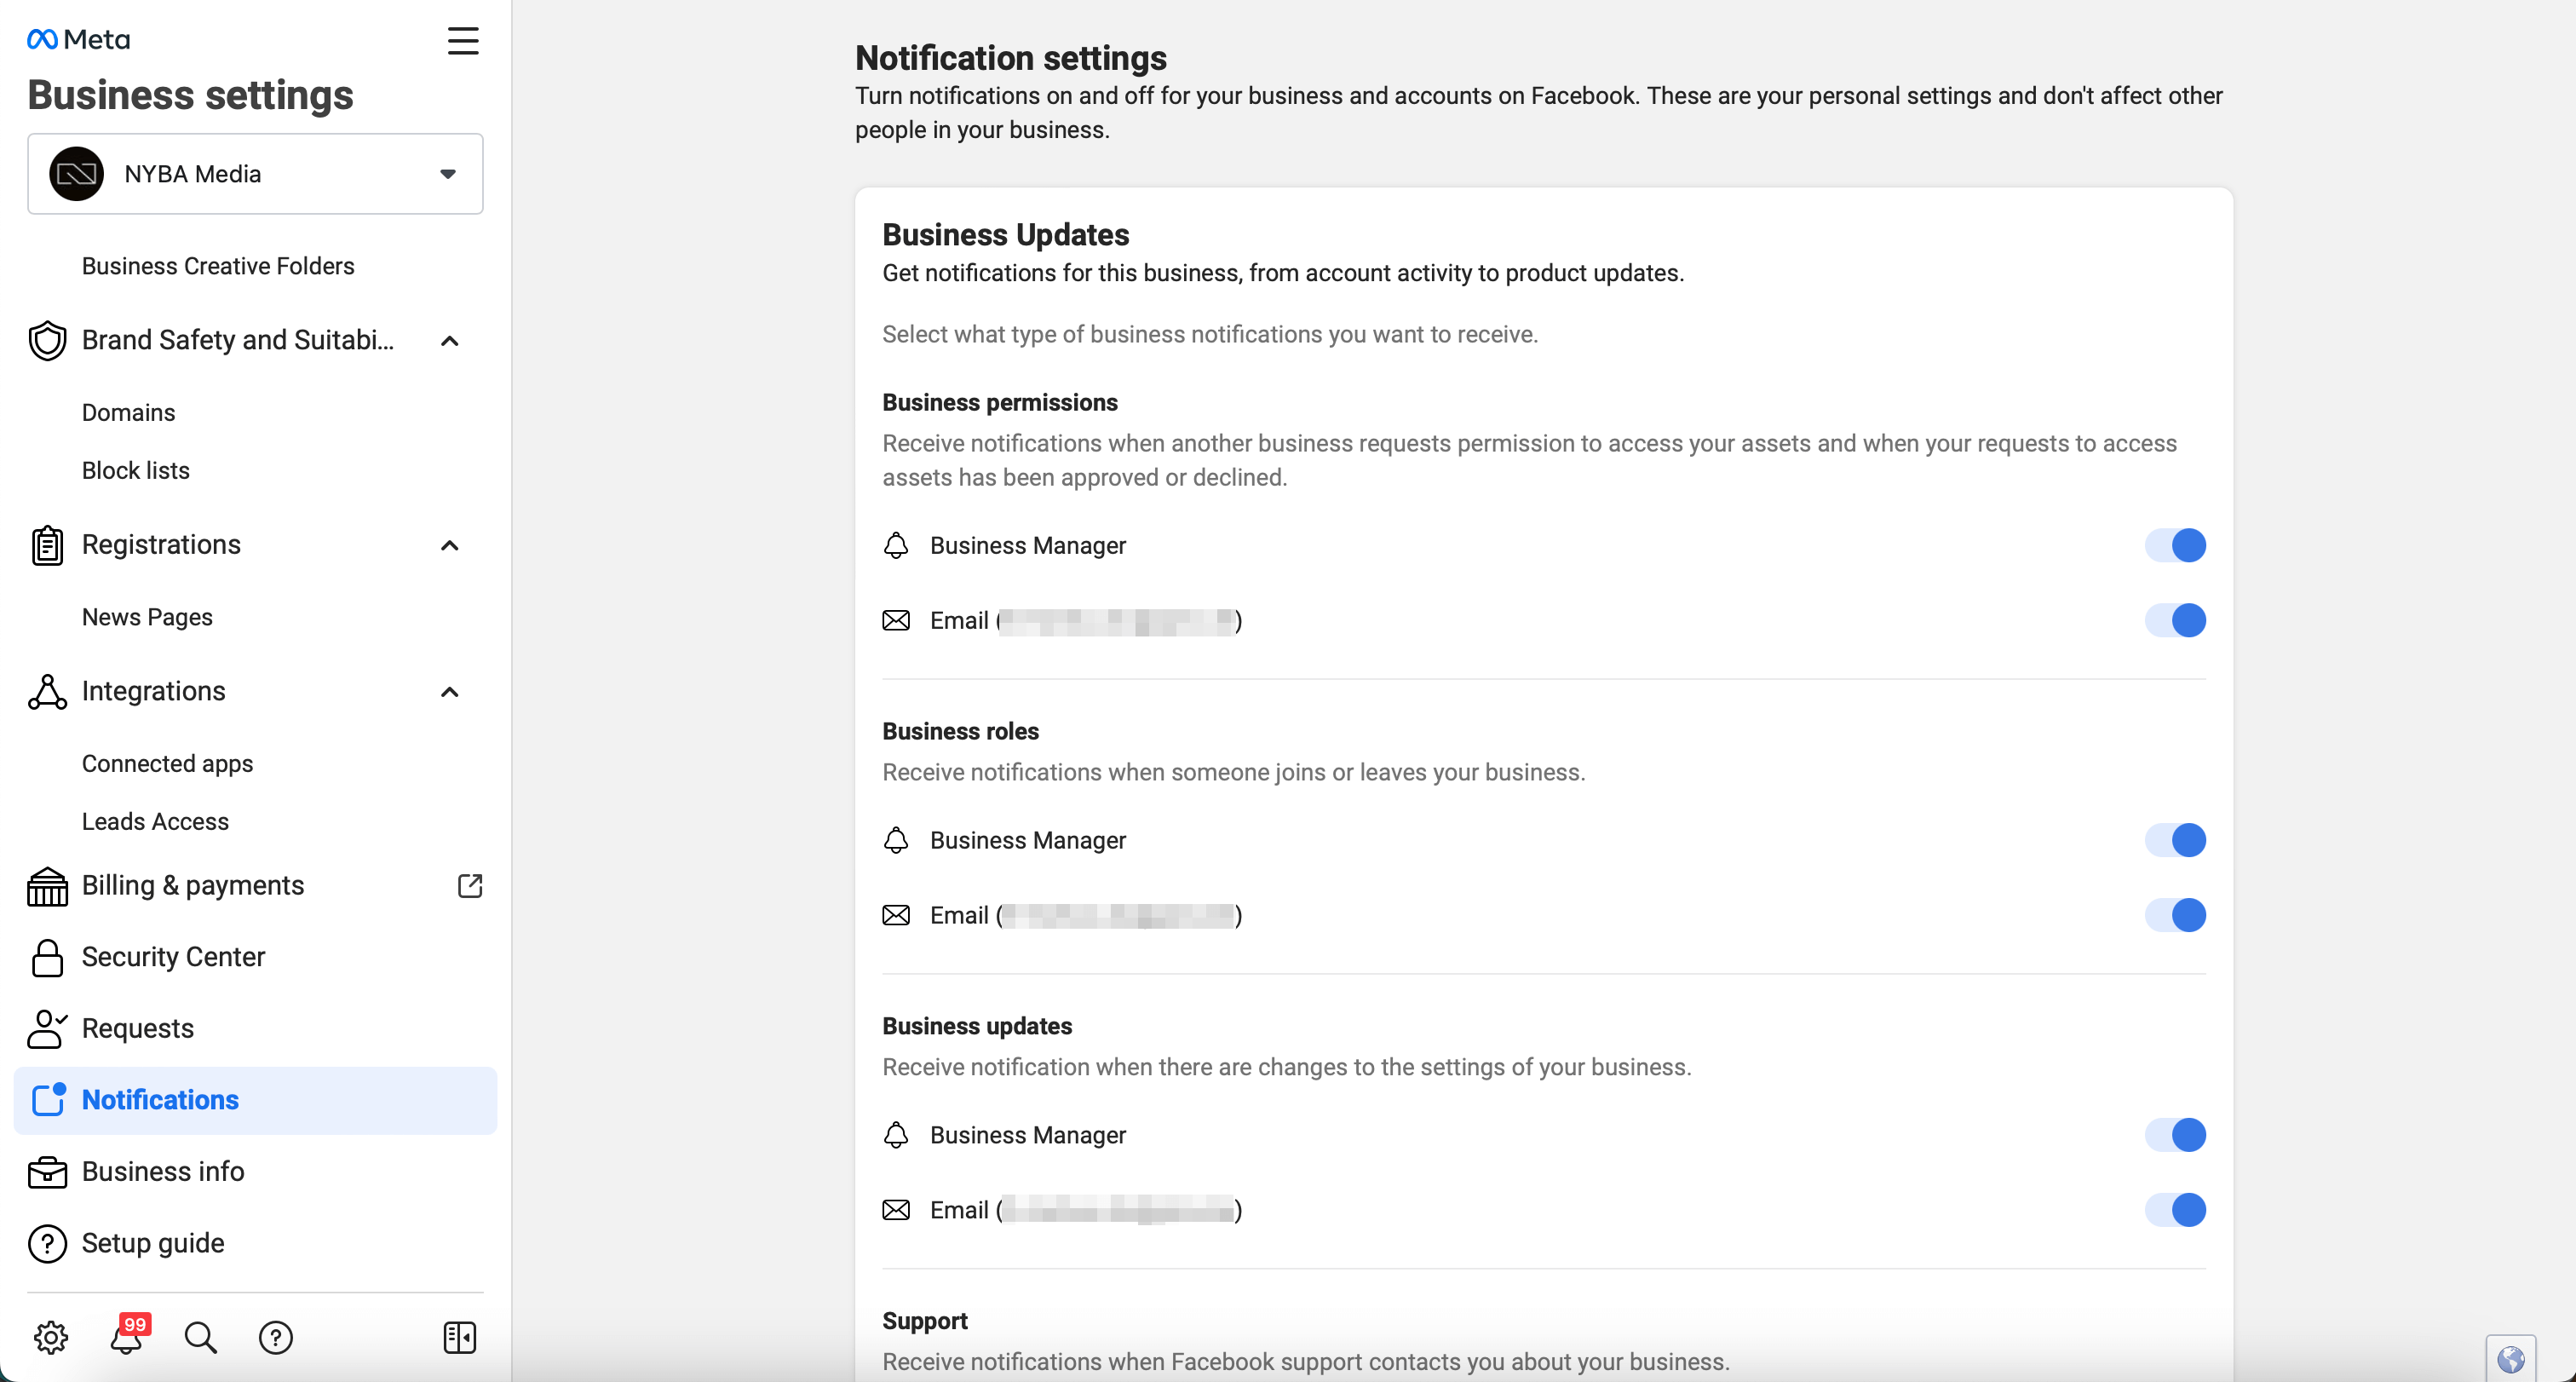
Notifications
Set up which events trigger notifications, either in Business Manager or via email, e.g., permission requests or business updates.
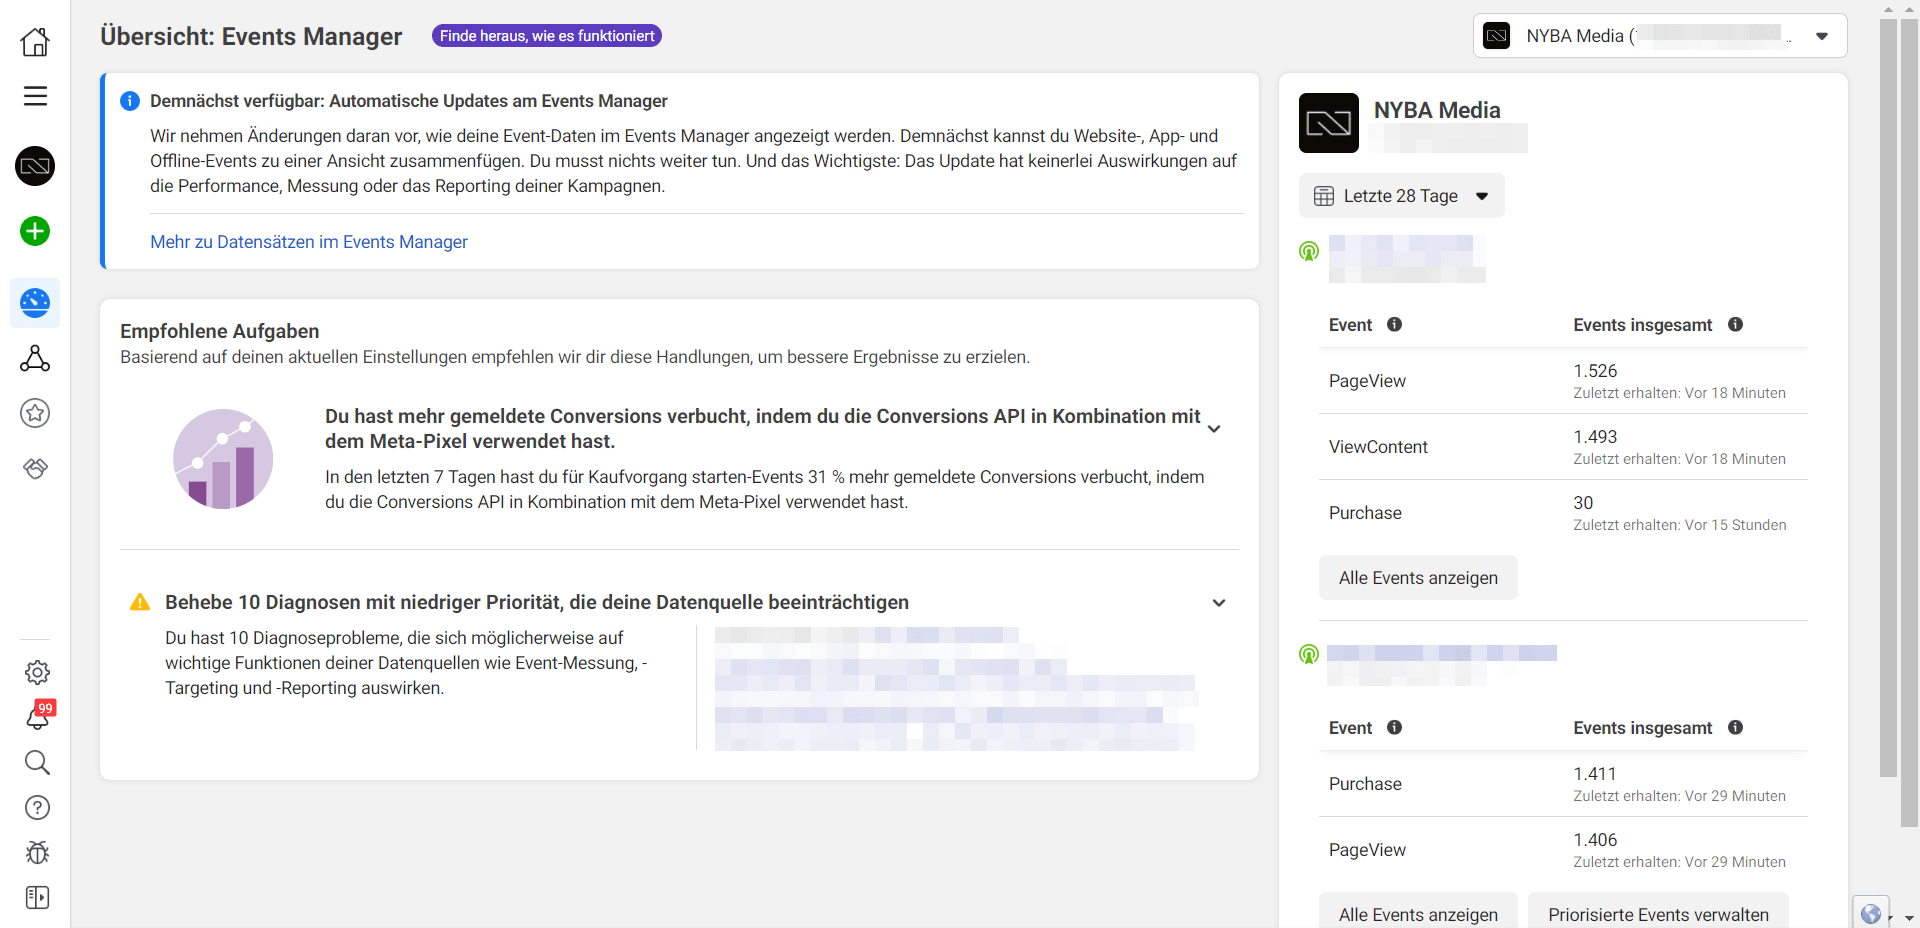
The Events Manager
The Events Manager is a component of the Meta Business Manager, specifically designed for managing Facebook Pixel and custom events. An "event" in this context refers to a specific action a user takes on your website that is tracked by the Facebook Pixel.
This can include a variety of actions, such as viewing a specific page on your website, adding a product to the shopping cart, completing a purchase, or even clicking a button. With the Events Manager, you can manage these events, customize them, and analyze their impact.
Setting up and using the Events Manager is a relatively simple process:
- Setting up the Facebook Pixel: The first step is to set up your Facebook Pixel. This code is placed on your website and collects data about the behavior and interactions of your visitors. More on this later.
- Setting up events: Once your Pixel is set up, you can start creating events. In the Events Manager, you can select standard events that Facebook has already created, or you can create your own custom events tailored to your specific needs.
- Analysis and optimization: After setting up the events, you can use the Events Manager to track how users interact with your website. You can then use this information to optimize your ad campaigns and better understand which actions users take on your site.
In summary, the Events Manager within the Meta Business Manager is a powerful tool for tracking and analyzing user actions on your website. It helps you gain valuable insights into customer behavior and make your online advertising campaigns more effective.
Create and Integrate a Pixel
- Create a Facebook Pixel
When you are in the Events Manager, click on the “Connect Pixel” button and select “Facebook Pixel” from the dropdown menu. - Name the Pixel and enter your website URL
You will now be prompted to give your Pixel a name and enter your website URL. The Pixel name helps you identify it later, especially if you manage multiple Pixels. After entering this information, click “Next.” - Choose a Pixel installation method
Next, you need to decide how to install the Pixel on your website. There are three main options:
- Manually add code: You will receive the Pixel code, which you insert into the header of your website. If you choose this option, make sure you have access to your website’s HTML code.
- Set up with a partner: Here you can select a partner tool that allows for easy integration of the Pixel code.
- Send instructions via email to a developer: If you are not the website administrator yourself, you can send instructions to your developer to install the Pixel.
- Insert the Pixel code
If you chose the manual insertion method, copy the code provided by the Meta Business Manager and paste it between the<head></head>tags on every page of your website. - Configure Pixel events
Now that your Pixel is installed, you can add events to track specific actions on your website. You can select standard events provided by Meta or create custom events tailored to your business needs. - Verify that your Pixel works
You can use the Facebook Pixel Helper, a Google Chrome plugin, to check whether your Pixel is correctly installed and sending events.
Congratulations! Your Meta Pixel is now set up. Keep in mind that it may take up to 24 hours for Pixel data to appear in your Meta Business Manager. With this tool, you can now analyze your website visitors’ behavior and optimize your advertising campaigns.
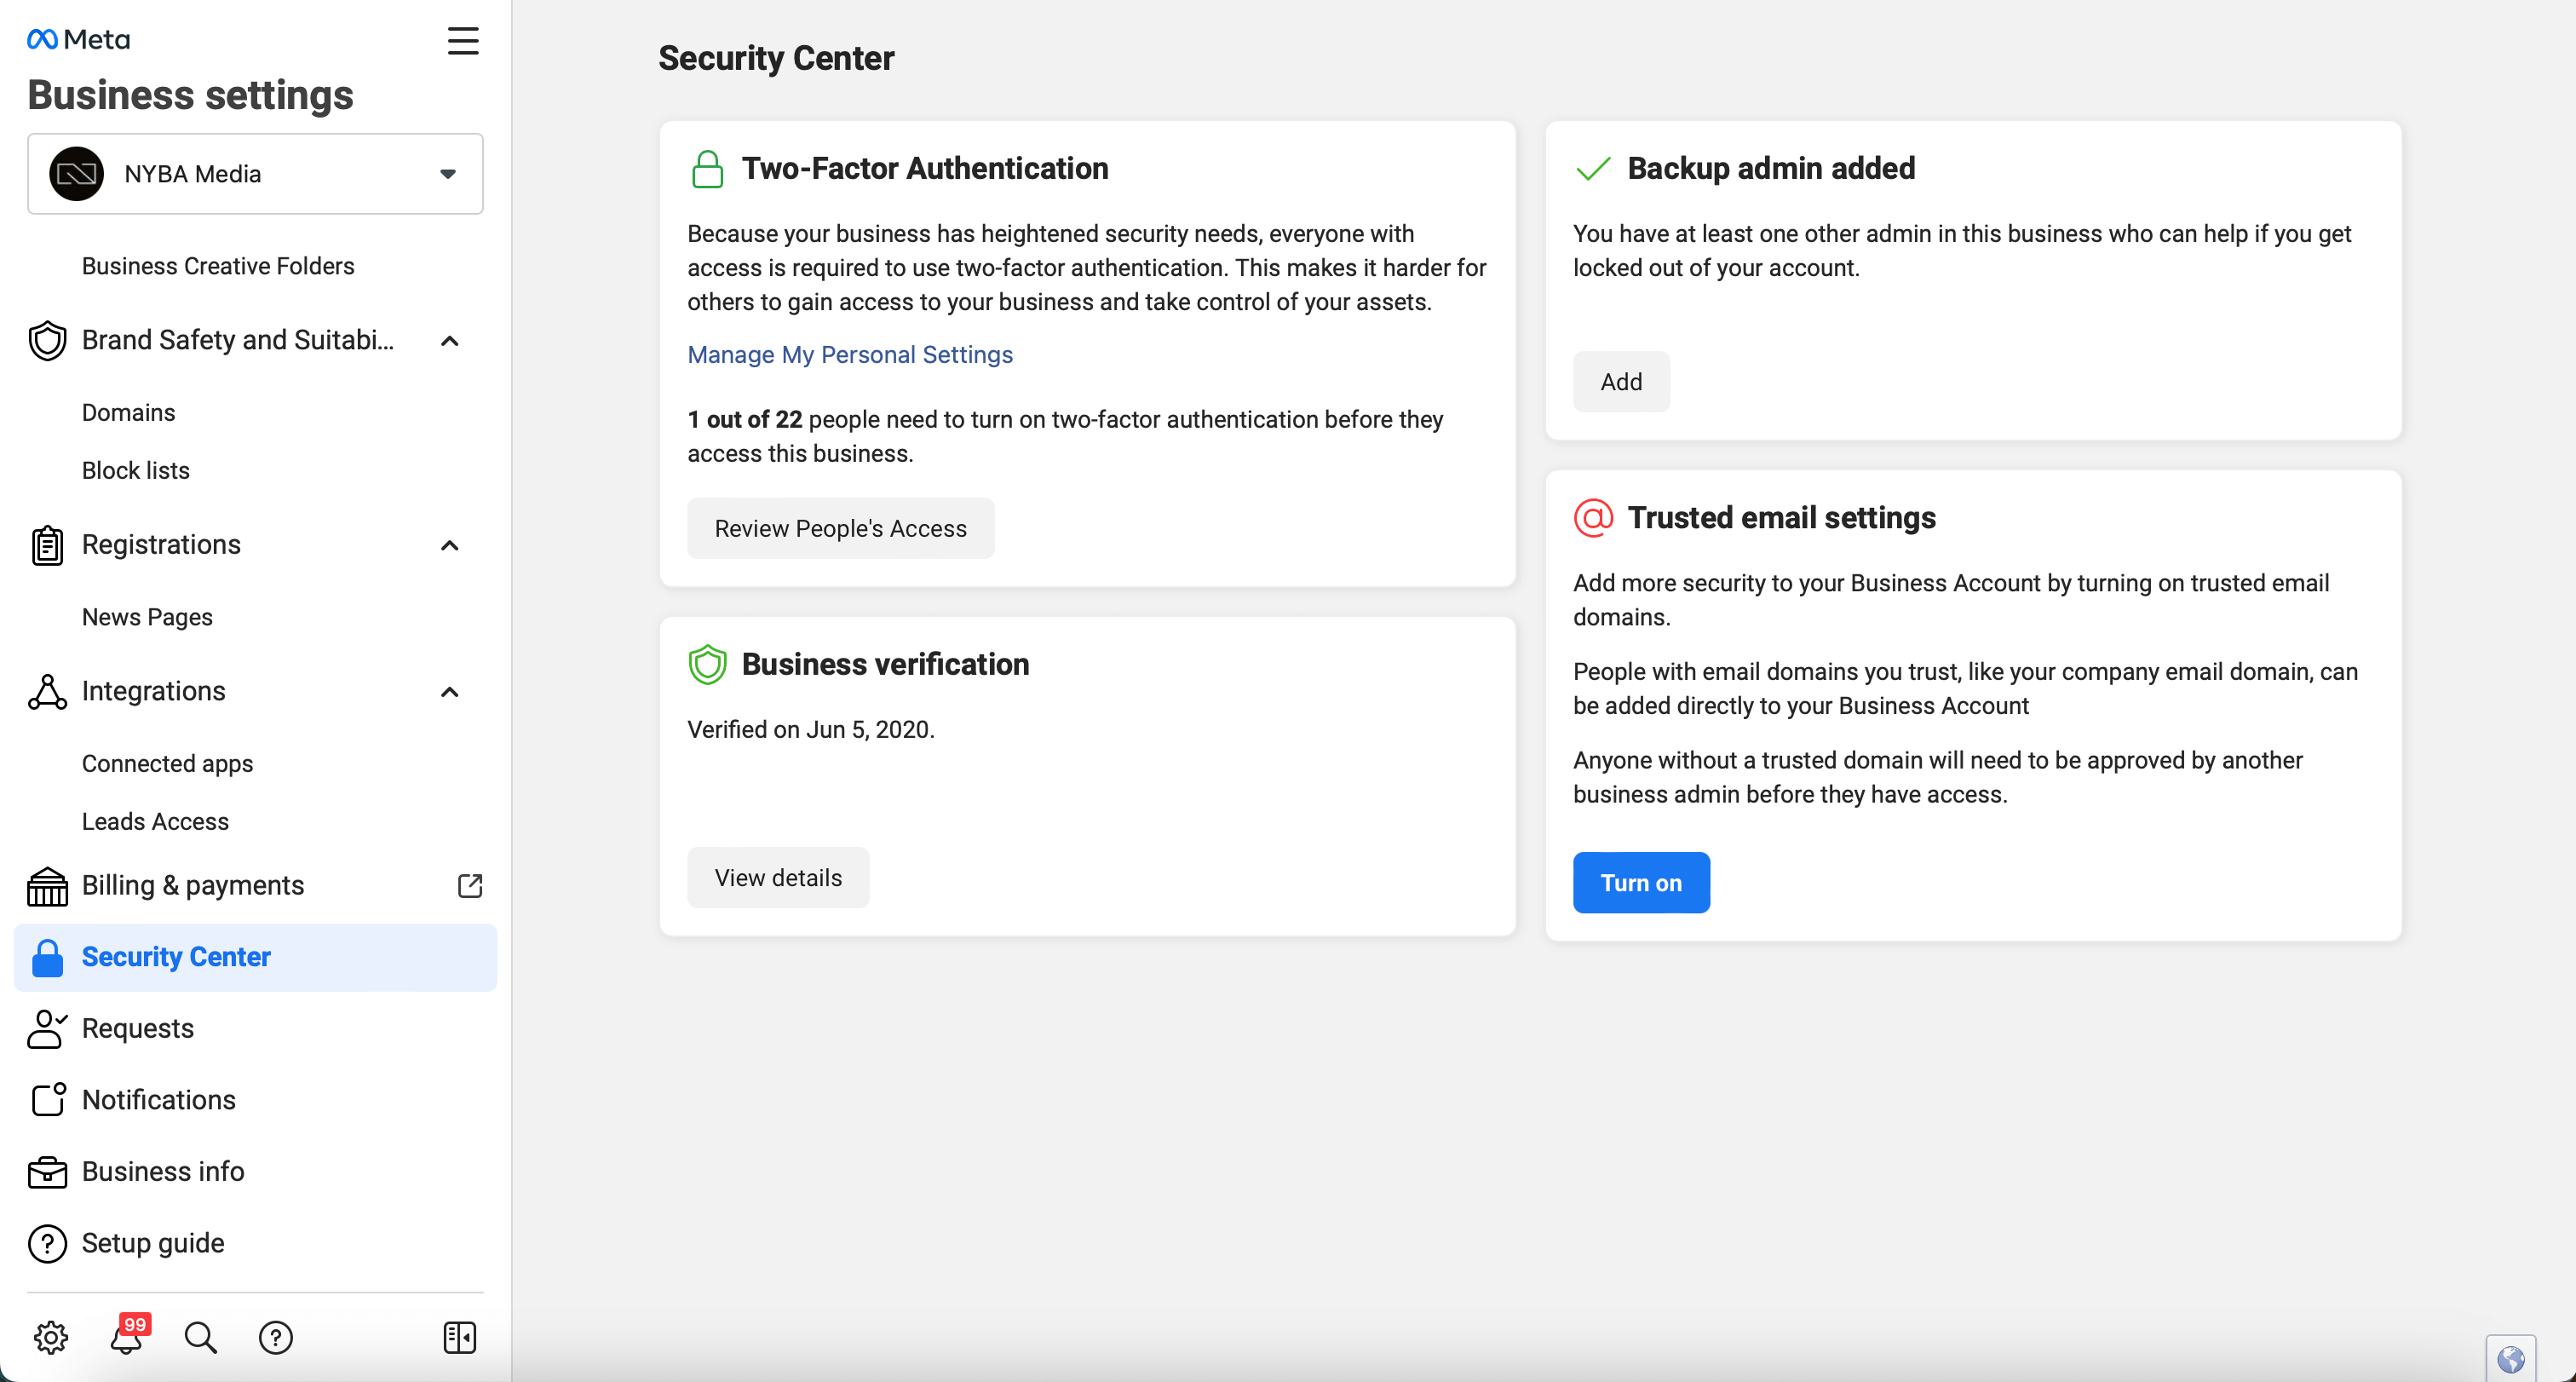
Verify Your Business & Other Features in the Security Center
Verifying your business in the Meta Business Manager is an essential step to ensure the credibility and security of your digital presence. Make sure you have full control over your business account before starting the verification process.
- Access the Security Center: Go to ‘Security Center’ in your Business Settings.
- Provide business information: Enter accurate details about your business, such as the legal business name, business address, phone number, and website.
- Confirm business information: You may need to upload official documents to verify the information about your business.
- Select a contact method: Verify your connection to the business via a confirmed domain, email, or phone number. You will then receive a confirmation code.
- Complete the verification: Click “Done” to finish the process.
The verification decision can take anywhere from 10 minutes to 14 business days. You will be notified once the verification is complete. Note that you will need to redo the business verification if you change your business details.
The Security Center also provides additional features:
- Two-Factor Authentication (2FA): The Security Center allows you to set up two-factor authentication for your account. This adds an extra layer of security by requiring a second form of authentication, such as a code from your phone, to access your account.
- Backup Admin: This security feature ensures that at least two people always have full admin access to the Business Manager account. It provides an additional layer of protection, preventing the account from becoming inaccessible if the primary admin is unavailable or loses their login credentials.
- Trusted Email Settings: The “Trusted Emails” settings allow you to create a list of email addresses you trust, which are authorized to perform actions in your Business Manager account.
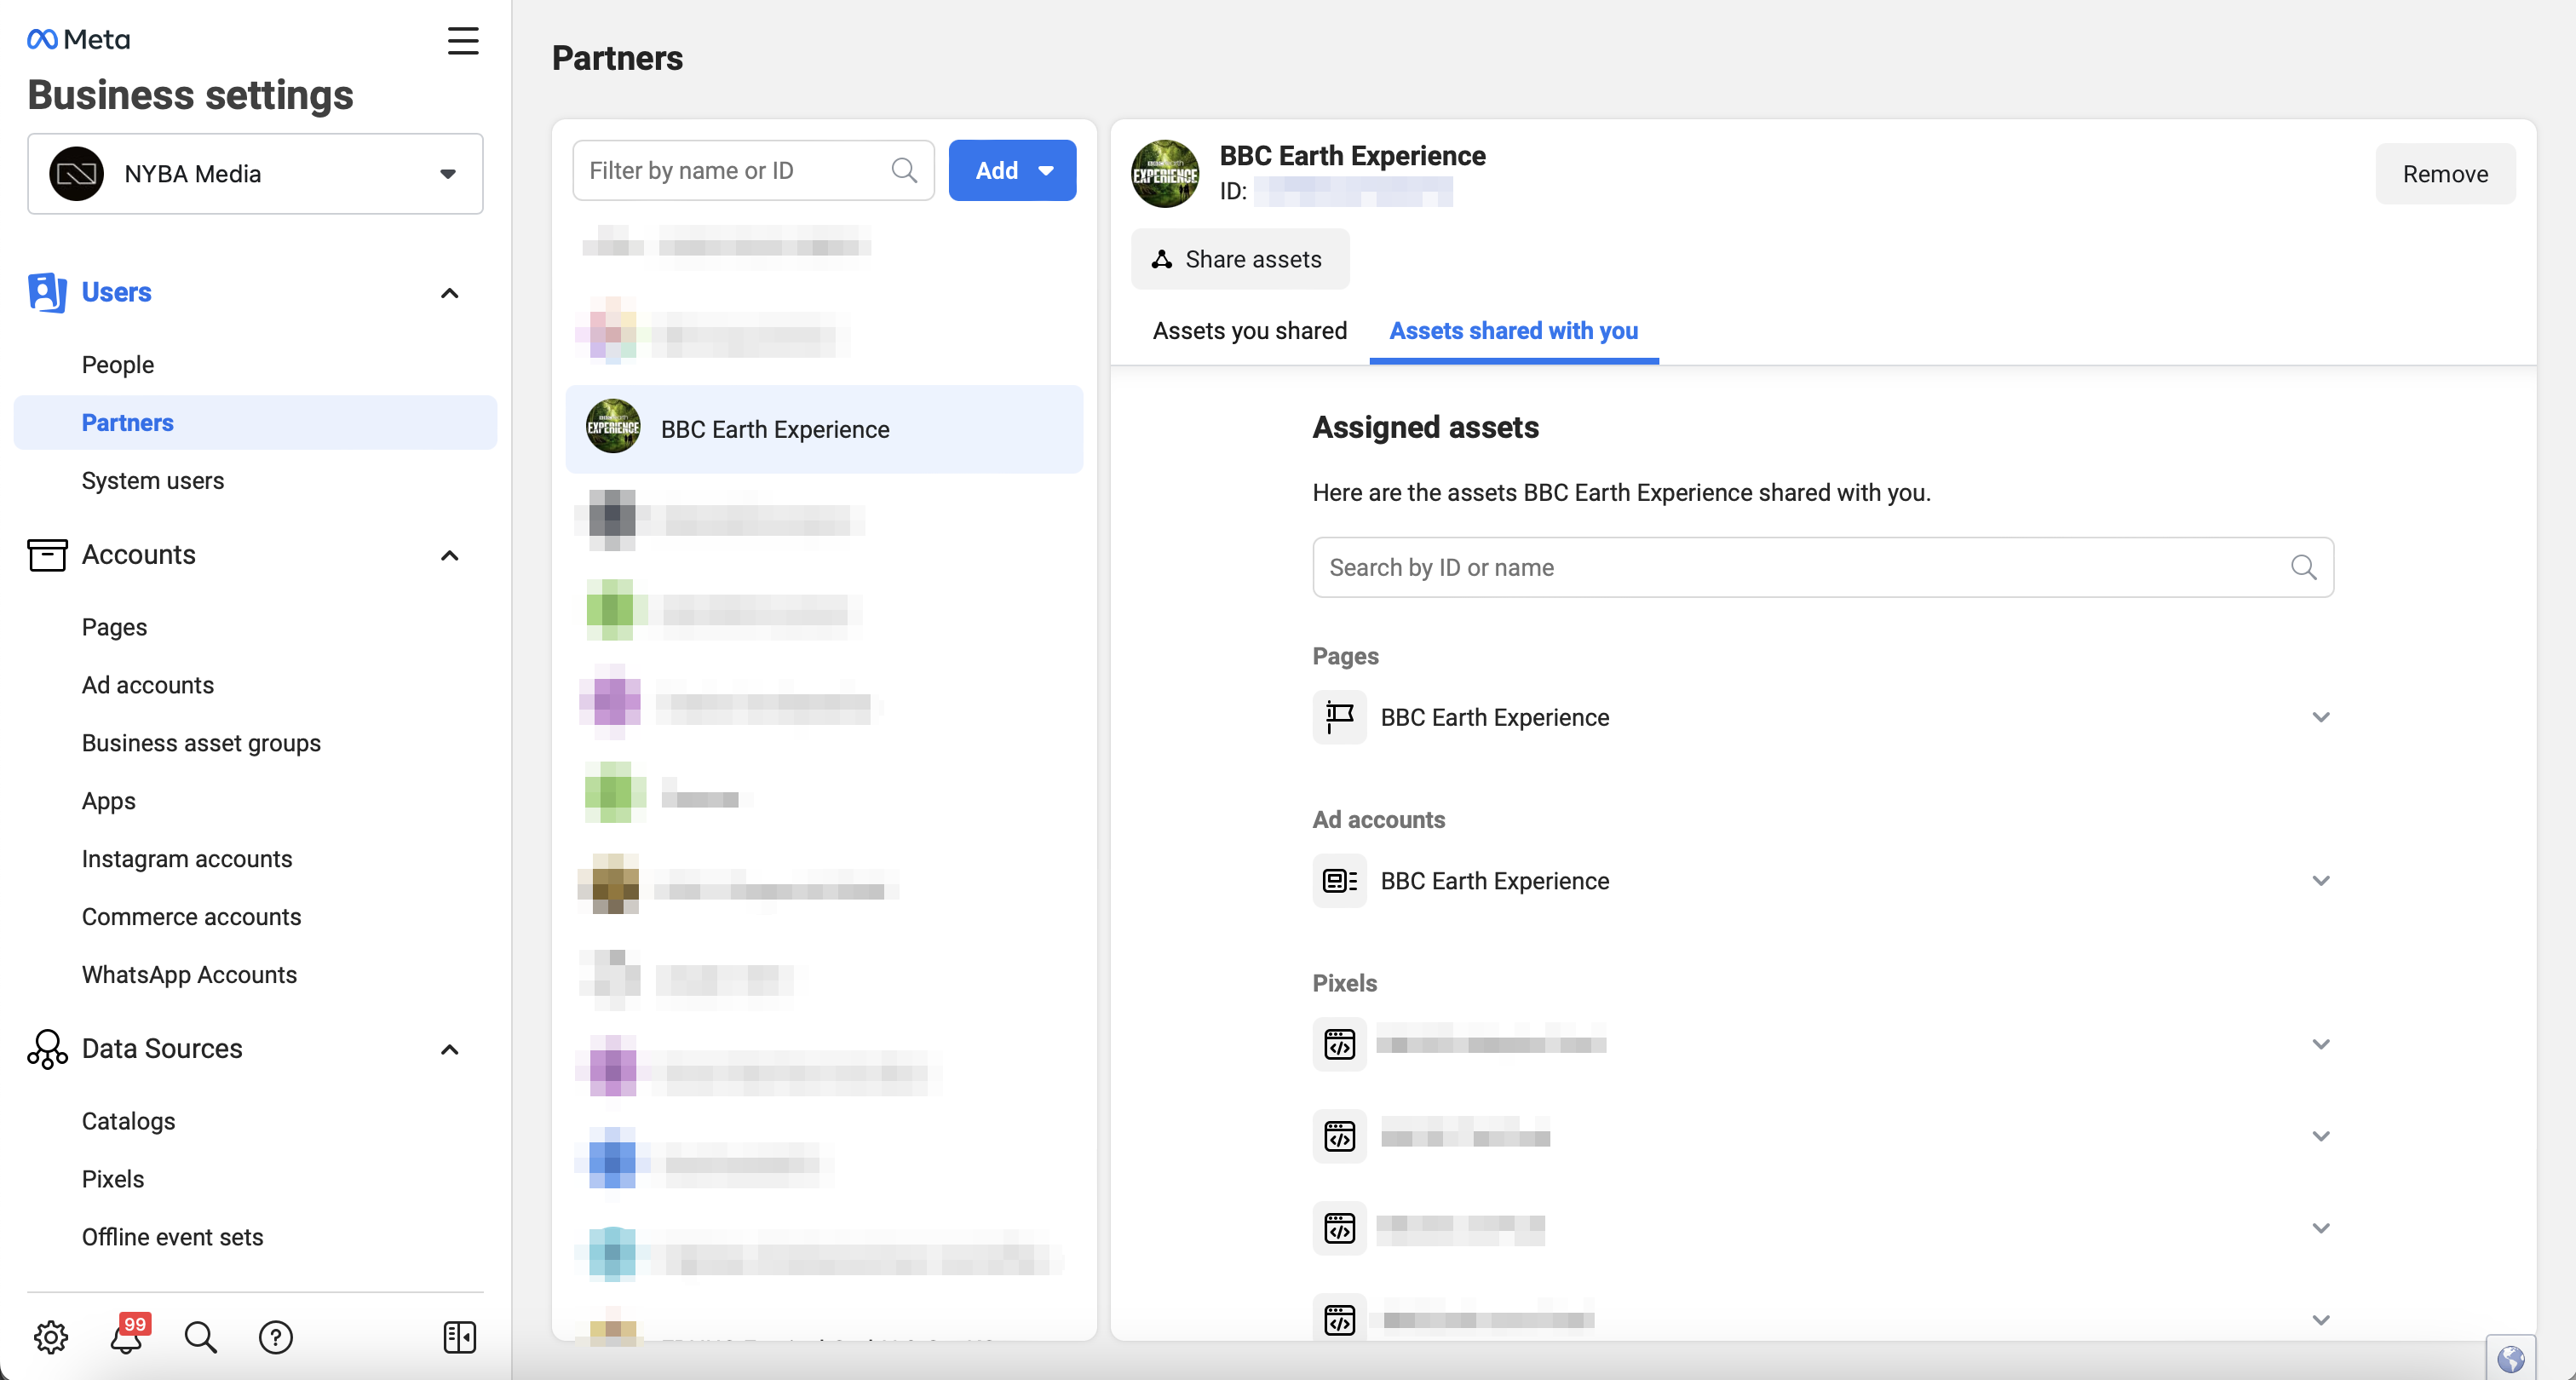
Request Access to a Page
Before you can request access to another person’s or business’s page, you must first set a primary page in your Business Manager. This is the main page that represents your business and is used to operate on the platform.
Once your primary page is set, you can request access to another page by following these steps:
- Open your Business Settings in Meta Business Manager.
- Click on Pages under the Accounts section.
- Click the blue dropdown button Add.
- Select Request Access to a Page from the dropdown list.
- Enter the name or URL of the Facebook page you want to access.
- Select the page permissions you need. These can range from simple viewing access to full editing rights.
- Click Request Access.
Your request will now be sent to the page admin or the person with full control of the business account that owns the page. Once your request is approved, the page will appear in your Business Manager account.
Verify Domain
Here you can find our blog article on verifying your Facebook domain.
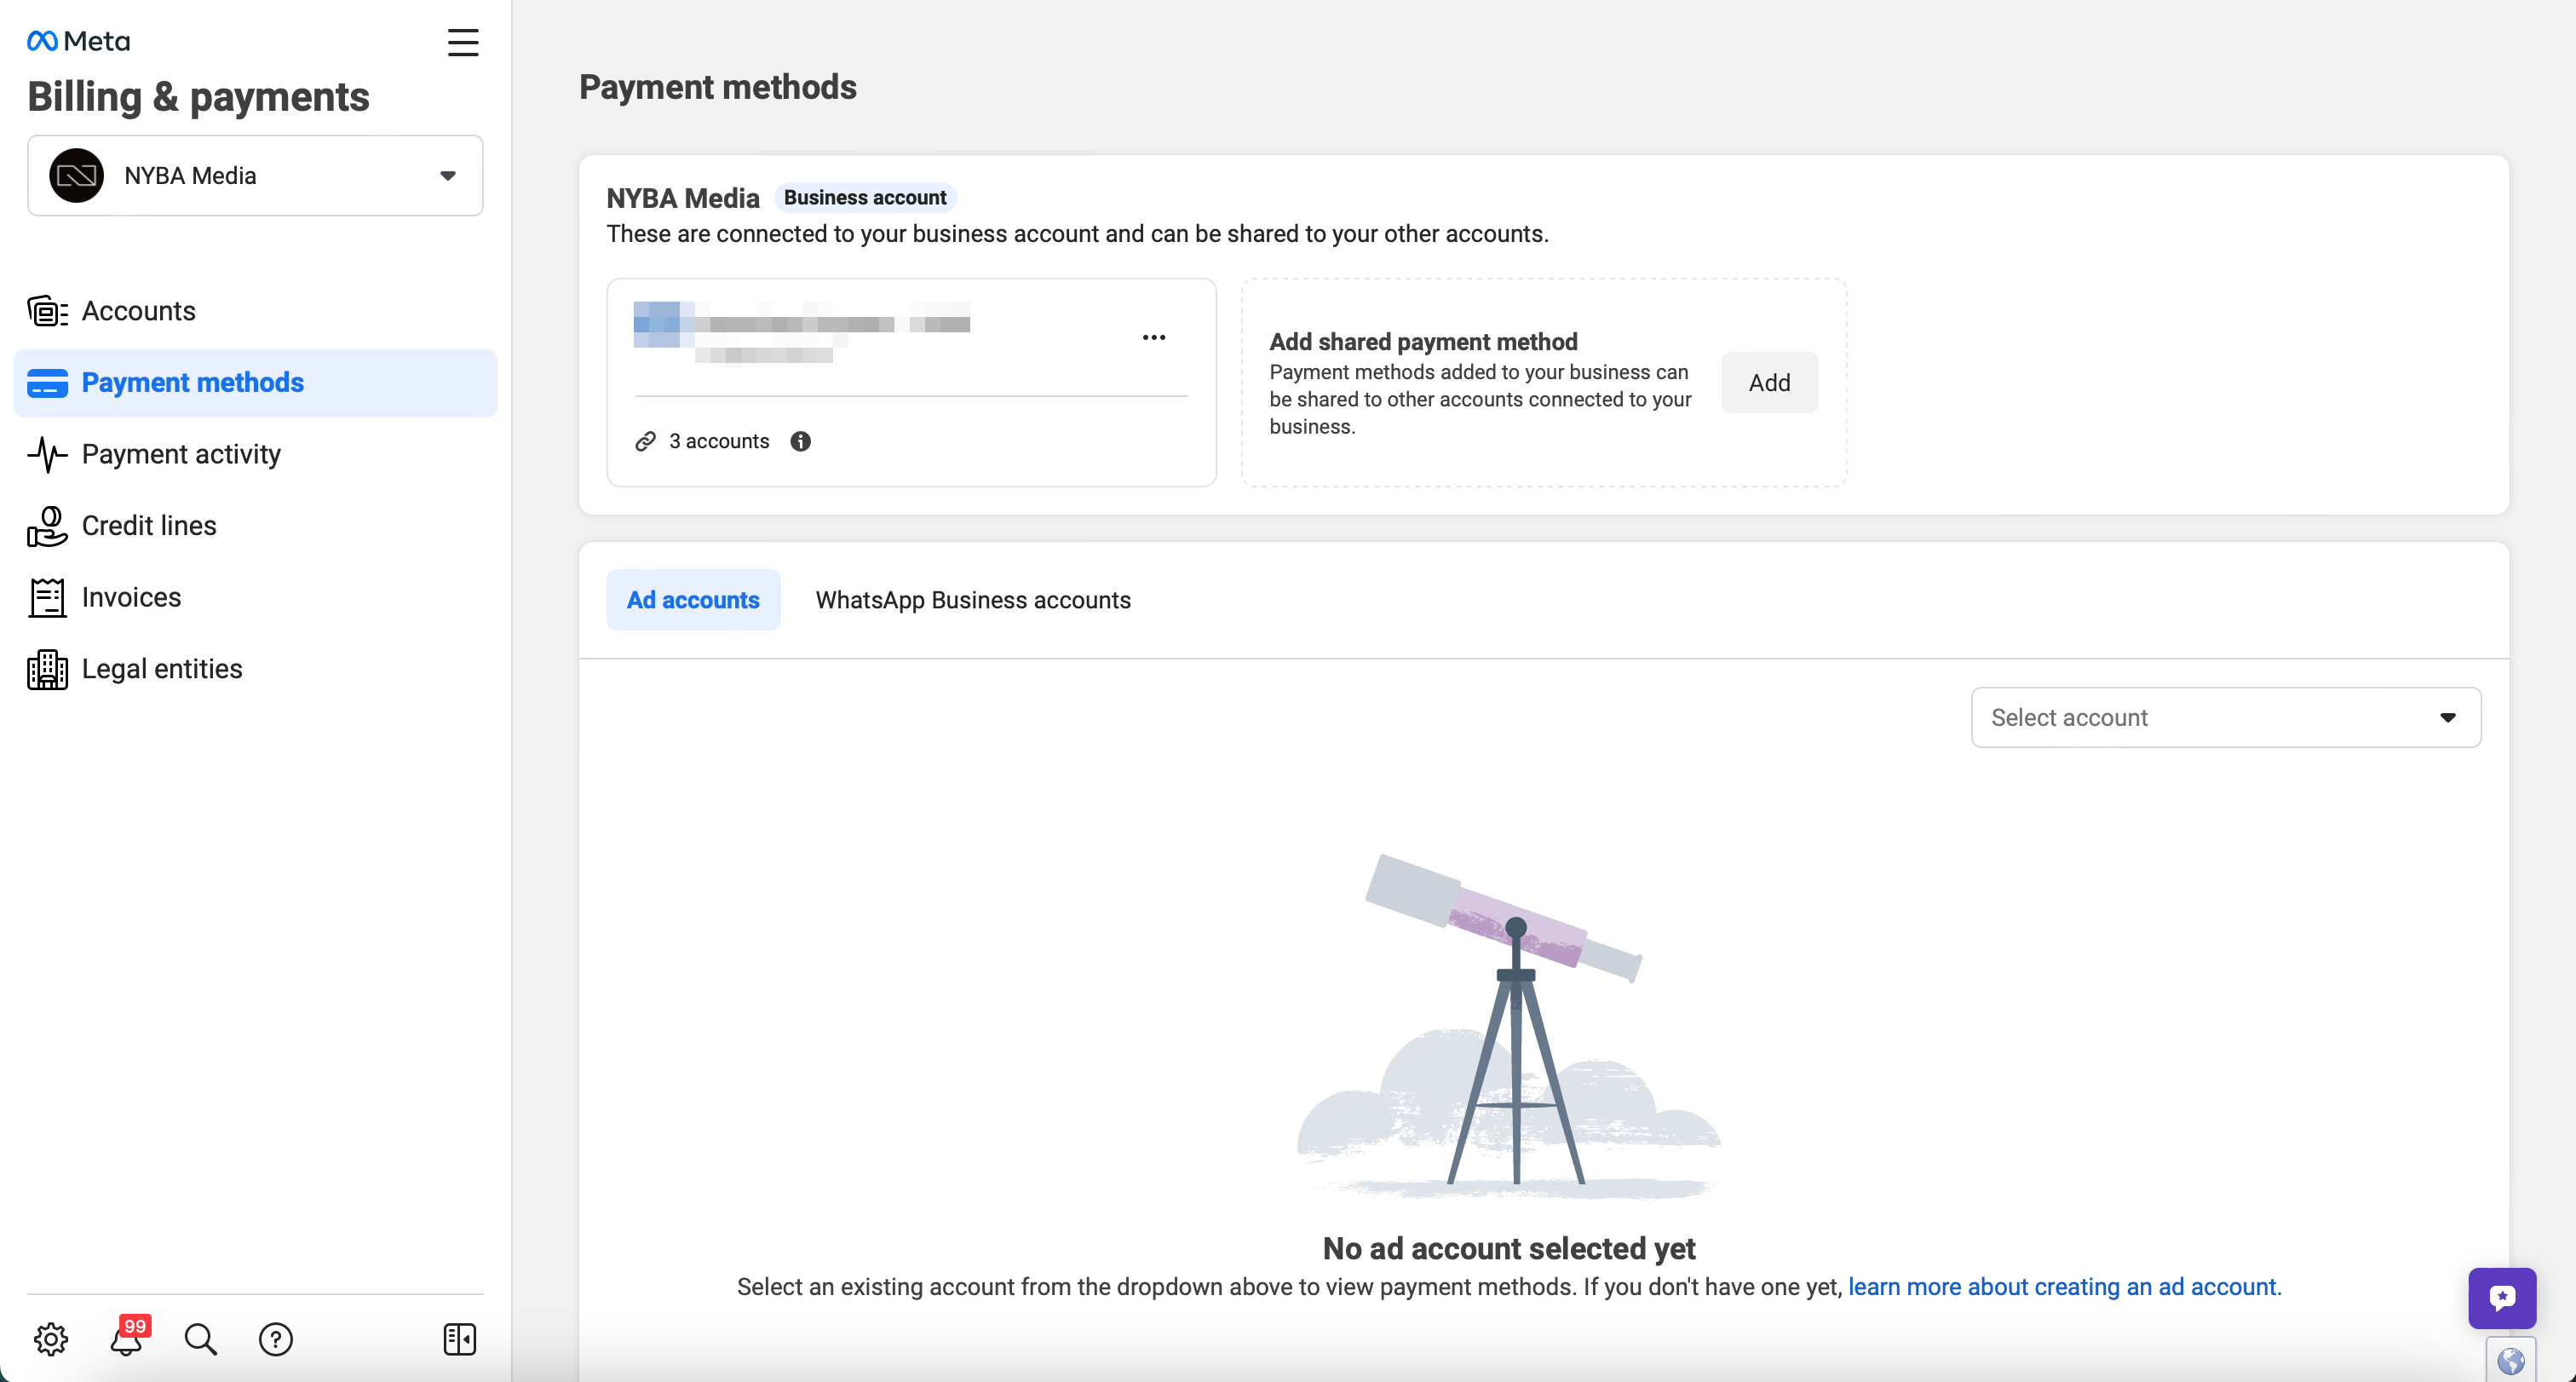
Add a Payment Method
Finally, you can add your payment methods:
- Go to Payment Methods in Business Settings.
- Select the correct ad account.
- Add a payment method for this account in the top right corner.
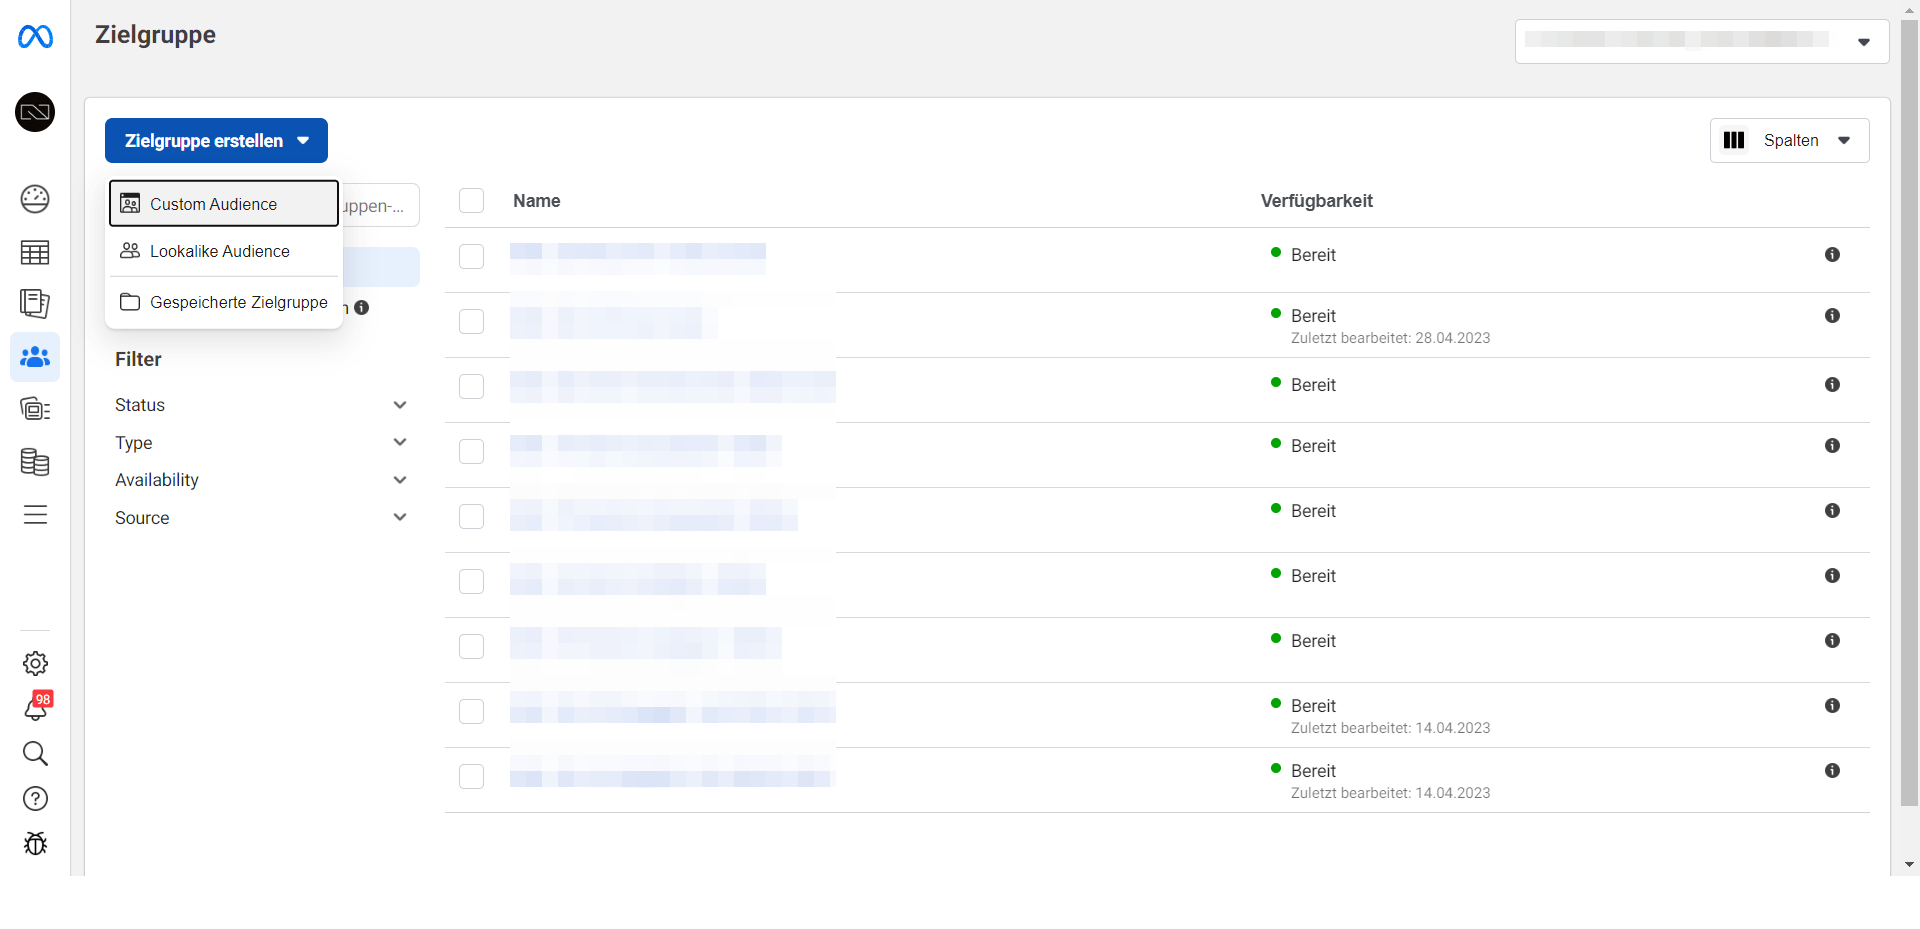
Audiences
In Meta Business Manager, there are different types of audiences you can create for your ad campaigns: Custom Audiences, Lookalike Audiences, and Saved Audiences. Each type of audience has its own specific use cases. Here’s a guide on how to create these different audiences.
Navigate to “Audiences”
Click on the menu in the left sidebar and select Audiences. This opens a page where you can see all your existing audiences and create new ones.
Creating a Custom Audience
Custom Audiences allow you to reach people who have already interacted with your business, whether on your website, in your app, on Facebook, or elsewhere.
- Click Create Audience and select Custom Audience.
- Choose the source for your Custom Audience. For example, select Website if you want to target people who visited your website, or Customer List if you have a list of contact details to upload.
- Follow the on-screen instructions to create your Custom Audience. The exact steps depend on the source you selected.
Creating a Lookalike Audience
Lookalike Audiences are audiences similar to people who have already interacted with your business. They are created based on a Custom Audience.
- Click Create Audience and select Lookalike Audience.
- Choose the Custom Audience you want to use as the source for your Lookalike Audience.
- Select the location and similarity percentage (1% most closely resembles your Custom Audience, while 10% includes a broader audience).
- Click Create Audience.
Creating a Saved Audience
Saved Audiences are audiences you create based on demographics, interests, and behaviors.
- Click Create Audience and select Saved Audience.
- Give your audience a name and optionally add a description.
- Select the geographic locations, age ranges, genders, and languages of your audience.
- Define detailed targeting options, including interests, behaviors, and demographics.
- Optionally, you can create a connection-type audience to reach people who have a specific relationship with your Page, app, or event.
- Click Create Audience.
Using Audiences in Ad Campaigns
Once you’ve created your audience, you can use it in your ad campaigns. Here’s how:
- Go to Ads Manager in your Meta Business Manager.
- Create a new ad campaign or edit an existing one.
- In the Ad Set section, you will be prompted to select your audience. Here, you can choose the audience you created.
- Complete the rest of your Ad Set and click Continue to proceed with creating your ad.
Managing and Updating Audiences
Over time, you may need to manage and update your audiences to align with changing marketing goals.
To edit an existing audience:
- Go back to Audiences in your Meta Business Manager.
- Click the checkbox next to the audience you want to edit.
- Click Edit to make changes, or Delete to remove the audience.
Sharing Audiences (Shared Audiences)
Once you’ve created a Custom Audience or Lookalike Audience:
- Click the checkbox next to the audience you want to share.
- Click the Actions dropdown menu and select Share.
- Enter the Business ID or the name of the Business Manager you want to share the audience with.
- Choose the desired permission:
- Use Only allows the other Business Manager to use the audience in ads but not edit it or see who is included.
- Use and View allows the other Business Manager to use the audience in ads and see who is included, but not edit it.
- Click Share.
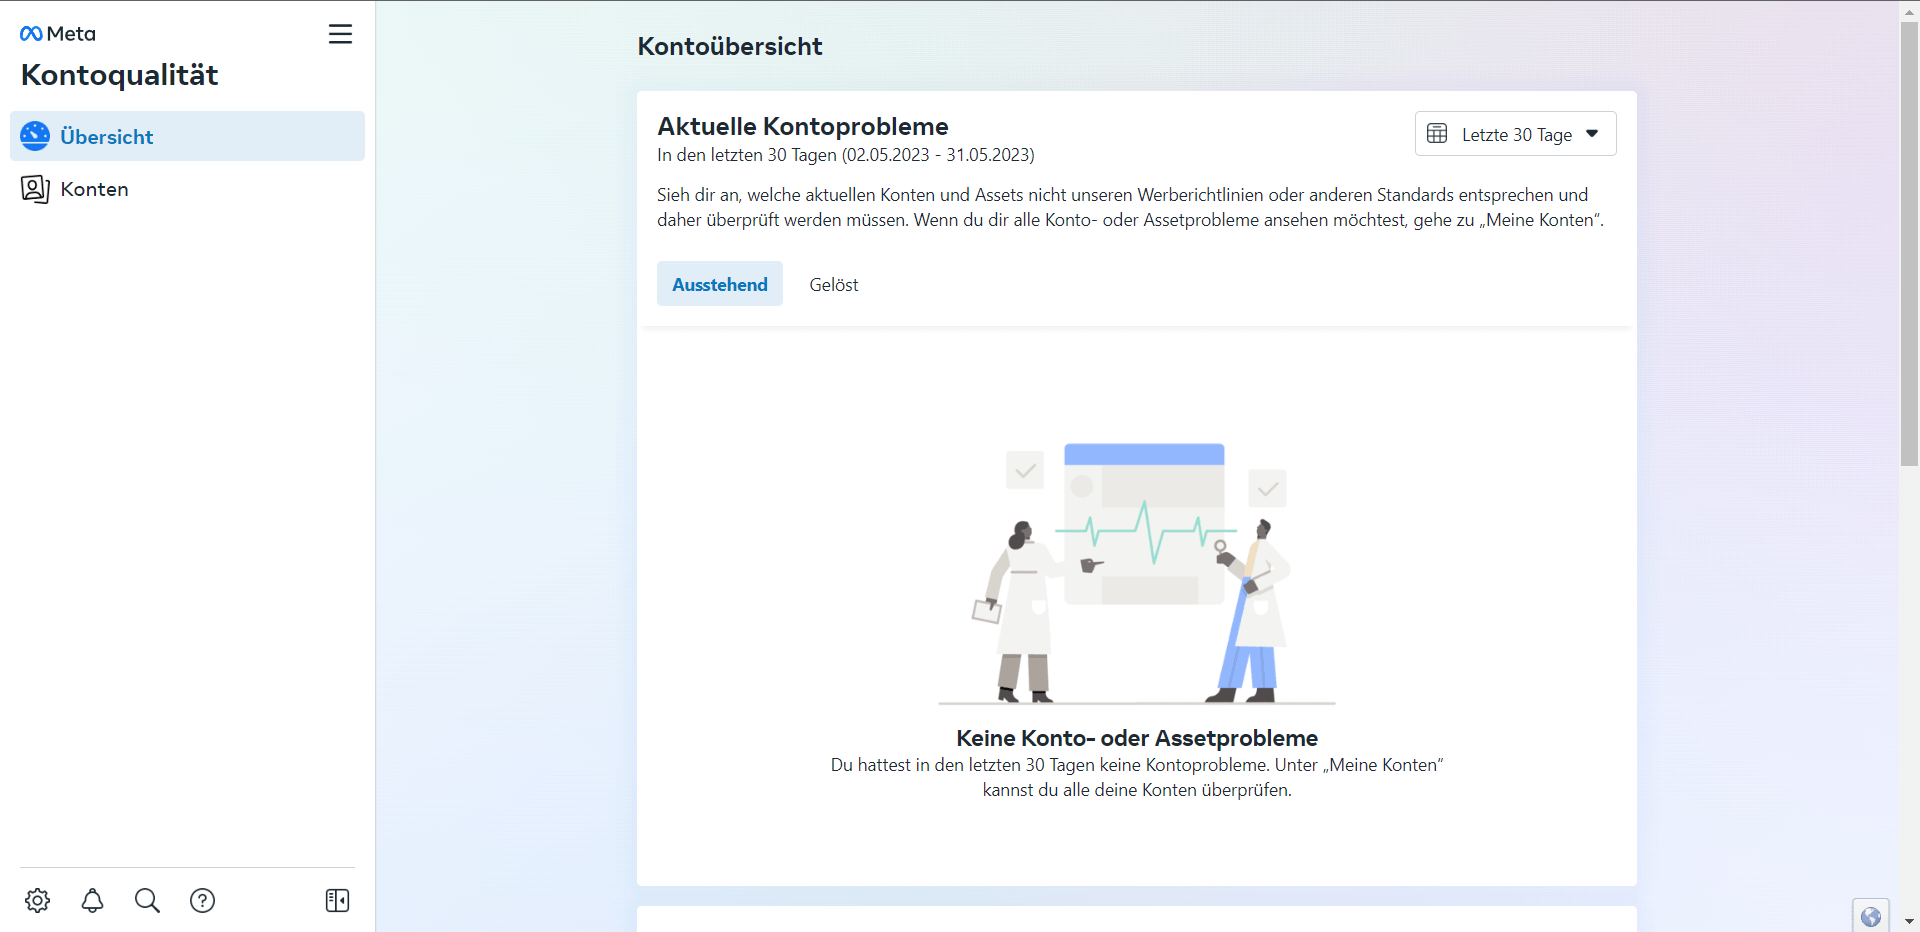
Account Quality
Account Quality is a feature in Meta Business Manager that helps you monitor and manage the health of your ad account. It shows whether any actions have been taken against your account or ads, and what you can do to resolve potential issues.
On the Account Quality page, you will see a summary of your ad account’s status. Here are some things to pay attention to:
- Active Issues: This section lists all current issues that could affect your ad account, such as disapproved ads or violations of advertising policies.
- Past Issues: Here you can find information about previous issues that have already been resolved.
- Ad Account Status: This shows the overall health of your ad account. An account can be in good standing, but it can also be restricted or even disabled if it repeatedly violates advertising policies.
If your account has active issues, you should address them as soon as possible. Each issue is listed with a recommendation for resolution. For example, you might be asked to edit an ad and resubmit it for review, or you may be prompted to appeal a decision if you believe a mistake has been made.
It is important to regularly check your Account Quality to ensure your ad account remains in good standing and that all your ads comply with advertising policies.
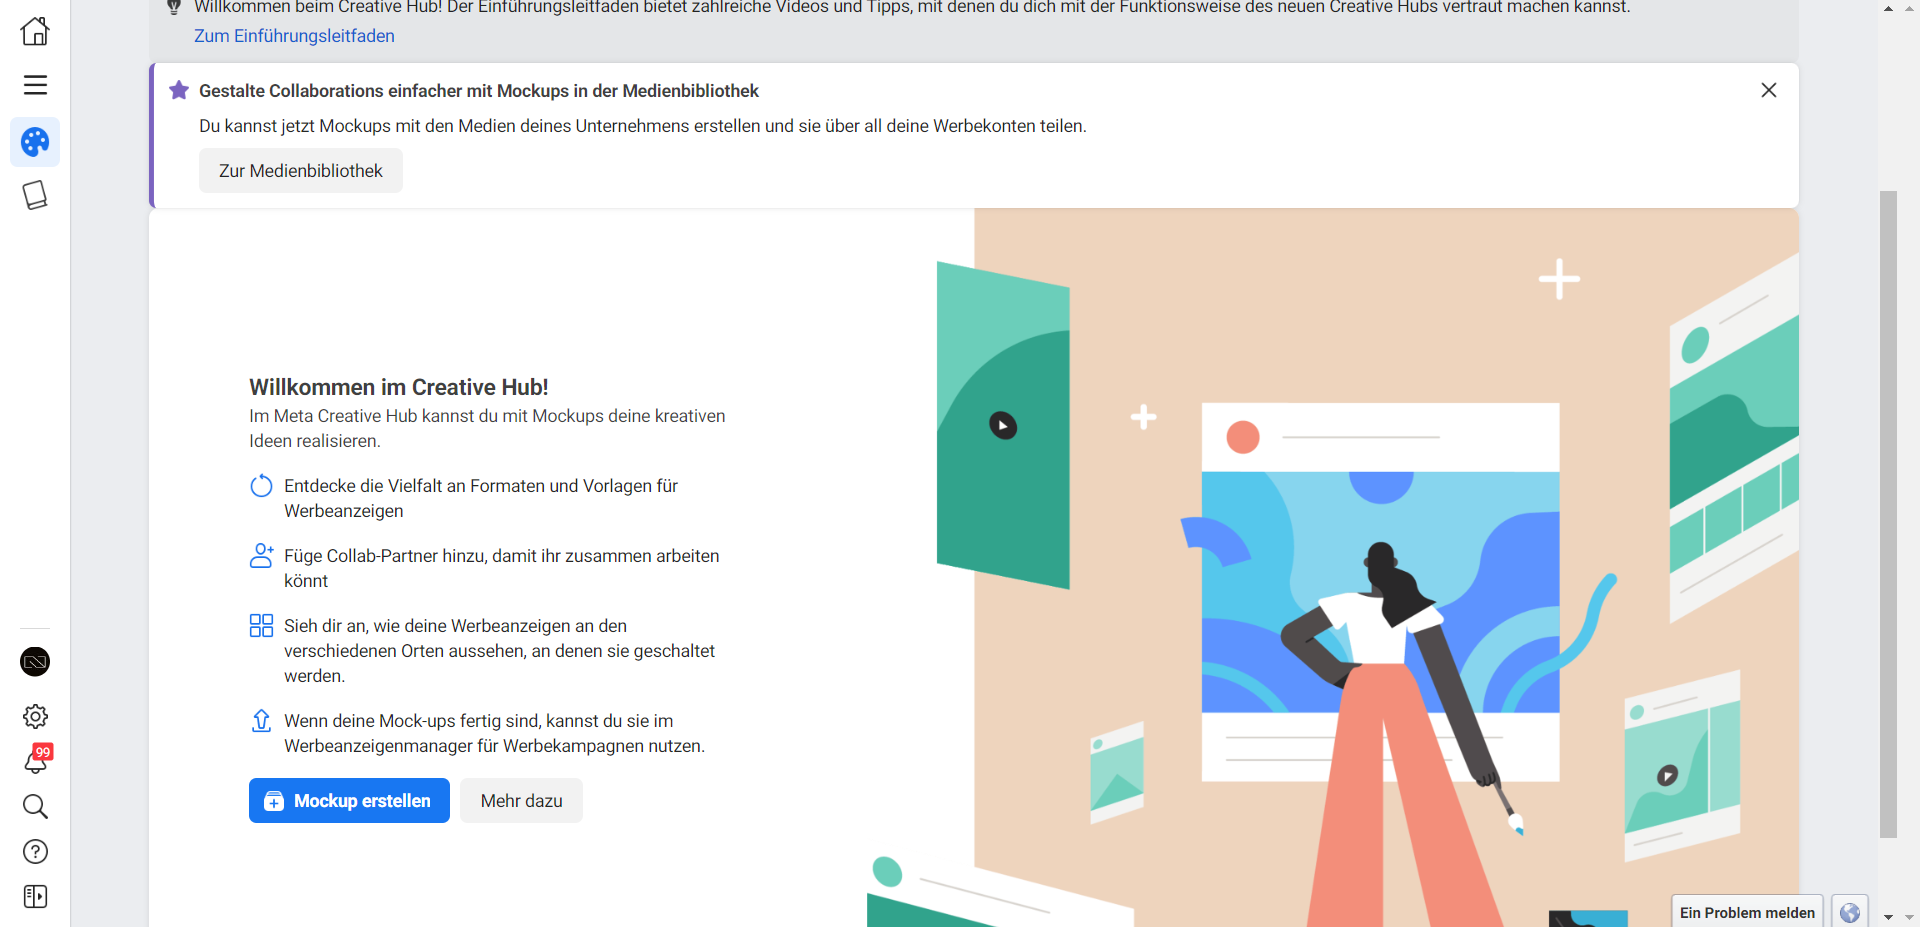
Creative Hub
Meta’s Creative Hub is a platform that helps advertisers and designers create engaging and effective ad content. With Creative Hub, users can create ad mockups for various Meta platforms (such as Facebook and Instagram), share them with their teams, and explore ad formats and ideas used by other businesses worldwide.
Here are some of the main features of Creative Hub:
- Mockup Tool: This tool allows you to create ad mockups for different ad formats and platforms, including Instagram Stories, Facebook Feed ads, and more. You can save these mockups and share them with your team to get feedback before creating the final ad.
- Inspiration Gallery: In the Inspiration Gallery, you can view ads from other brands to gather ideas and inspiration for your own campaigns. You can filter by industry, ad format, or campaign objective.
- Test and Learn: You can test different versions of your ads to see which performs best. You can change various elements of your ad, such as the image, text, and call-to-action, and then see which version delivers the best results.
Congratulations! 🎉After completing these steps, you have successfully set up your Business Manager! 🥳


